

How to Use a Watch Restoration Kit Without Damaging It
A watch restoration kit safely cleans grime, lifts light surface scratches, and revives shine, but only after you confirm the watch is sound. Before any wet cleaning, check that the case is water-resistant and that the crown is fully screwed down or pushed in. Skip that step and you risk moisture finding its way past the seals.
A restoration kit, used correctly, will:
- Clear years of built-up oil, sweat, and dust from bracelets and case backs
- Restore a warm, factory-fresh shine to polished metal surfaces
- Reduce the visibility of hairline scratches and light surface marks
- Refresh leather, rubber, and fabric straps without drying or cracking them
TL;DR:
- Verify the watch’s water resistance and ensure the crown is fully secured before wet cleaning to prevent moisture from entering past the seals.
- Use gentle tools like microfiber cloths, soft brushes, and mild solutions, avoiding mixing cleaning and polishing products to prevent damage.
- Detach metal bracelets and soak them in lukewarm water with a drop of dish soap, then brush and dry thoroughly to remove trapped grime.
- Handle leather straps with minimal moisture, and avoid soaking or over-conditioning, while rubber straps tolerate soaking but require inspection for early cracks.
- Reserve polishing cream for light surface scratches and only after thorough cleaning, avoiding over-polishing that can soften edges and diminish value.
Table of Contents
- What’s in a Watch Restoration Kit and What Each Piece Does
- How Do You Know if a Watch Is Safe to Wet Clean?
- Step-by-Step: Cleaning a Metal Bracelet and Case
- Caring for Leather, Fabric, and Rubber Straps
- When Should You Polish a Watch, and When Should You Not?
- How Often Should You Clean and Maintain a Luxury Watch?
- Signs You Need a Watchmaker, Not a Home Fix
- A Component-by-Component Walkthrough for First-Timers
- How to Open and Close a Watch Case Without Causing Damage
- Tools Beyond the Kit Worth Having on Hand
- Common Mistakes That Damage Watches During Restoration
- Handling the Movement Safely During Any Cleaning
- Checking Your Watch After a Restoration Session
- The Honest Take on Home Watch Restoration
- Where ChronoCare Kits Fit Into This Process
- Key Takeaways
- Sources
What’s in a Watch Restoration Kit and What Each Piece Does
A well-built kit gives you a small set of tools, each matched to a specific job. Microfiber cloths handle everyday wipe-downs and drying. Soft detail brushes, often a repurposed toothbrush head or a dedicated watch brush, get into the gaps between bracelet links where grime hides. A mild, non-perfumed cleaning solution breaks down oil and sweat without attacking metal finishes or gaskets.
Polishing cream is a different tool for a different job. It’s designed to lift light surface scratches from metal, not to clean dirt, and it should never touch a strap or an anti-reflective (AR) crystal coating, since the abrasive compound can haze or scratch the coating permanently. Applicator pads or sponges spread polish evenly and keep your fingers off the metal. Pegwood or wooden toothpicks pick debris out of tight spots like clasp hinges without scratching, and sanitized wipes handle quick touch-ups between deeper cleanings.
- Cleaning tier: microfiber cloths, soft brush, mild solution, wipes
- Polishing tier: polishing cream, applicator pads/sponges
- Precision tier: pegwood or toothpicks for tight spaces
Watchmakers tend to favor this kind of simple toolkit, sticking to lukewarm water, soft brushes, and microfiber rather than aggressive chemicals that can degrade gaskets over time.
Pro Tip: Keep polishing cream and cleaning solution in separate labeled containers. Mixing them up, even once, can mean putting an abrasive compound on a strap that needed gentle wiping.
How Do You Know if a Watch Is Safe to Wet Clean?
Not every timepiece on your bench is a candidate for water and a brush. The crown, crystal edge, and case need inspection before anything gets wet. If you don’t know the watch’s service history, or it’s a vintage piece with no documented pressure test, treat it as non-water-resistant.
- Check the crown type: screw-down crowns need to be fully threaded in; push/pull crowns need to be pressed in firmly before any moisture contact.
- Inspect the case for chips, hairline cracks, or a crystal that sits unevenly. Any of these disqualify the watch from home wet cleaning.
- Look for loose screws, a wobbly bezel, or a case back that doesn’t sit flush. These signal a seal that may already be compromised.
- Set up a clean workspace: a soft pad or towel, strong overhead light, a loupe or magnifier, and painter’s tape over precious metal edges to prevent accidental polish transfer.
If the pressure test is older than two years or unknown, assume the seals have degraded. A dry cloth and brush routine is the safer path until a watchmaker confirms the case is sound.
Step-by-Step: Cleaning a Metal Bracelet and Case
This sequence applies only to sound, water-resistant watches that passed the precheck above. If you’re working on a vintage piece or anything with an uncertain seal history, skip straight to dry-cloth methods.
- Detach the bracelet if your case allows it. Working on the bracelet separately protects the case from moisture and lets you clean between every link.
- Soak detached bracelets for 10 to 15 minutes in lukewarm water with a single drop of neutral, unscented dish soap. Don’t use hot water. It can loosen adhesives on some clasp components.
- Brush gently between links with a soft-bristled brush, working in short strokes to dislodge trapped skin oils and dust.
- Rinse thoroughly under lukewarm running water, then dry immediately with a microfiber cloth. Let the bracelet air-dry completely before reattaching it.
- Clean the watch head with a barely damp cloth or soft brush, unless the watch has been pressure-tested for full immersion. Wipe the case back, lugs, and crown area, then dry right away.
Removing the bracelet does double duty: it protects the case from trapped moisture and gives you better access to clean grime that otherwise sits abrading the metal every time you move your wrist.
If you’re polishing after cleaning, mask brushed-finish sections with tape and work one small section at a time. Never let polish drift toward an edge, chamfer, or hallmark stamp. Check the bracelet link cleaning checklist for a link-by-link reference if your bracelet has an unusual clasp design.
Pro Tip: Lay a strip of painter’s tape along the top edge of a brushed bezel before polishing an adjacent polished chamfer. It only takes a second, and it saves you from blending two finishes that were never meant to match.
Caring for Leather, Fabric, and Rubber Straps
Straps need different handling than metal, and the biggest mistake collectors make is treating them the same way.
- Leather should never be soaked. Wipe with a barely damp cloth, dry immediately, and condition sparingly, once or twice a year at most, since over-conditioning shortens leather life rather than extending it. Rotating between two or three straps gives leather time to recover and lets a natural patina develop.
- Fabric straps (NATO style) come off easily and can be hand-washed with mild soap. Air-dry them fully away from direct heat or sunlight before putting them back on.
- Rubber and silicone straps tolerate a soak and gentle brushing better than leather does. Rinse, dry completely, and inspect the strap for early cracking, especially near the buckle holes.
Whenever possible, remove the strap entirely before wet-cleaning the case or bracelet. It’s faster, and it means you’re never trying to keep leather dry while water is running two inches away. For stubborn sweat discoloration, a dedicated strap stain guide walks through the safest lifting methods.
When Should You Polish a Watch, and When Should You Not?
Polishing and deep refinishing aren’t the same thing. A kit’s polishing cream is built to smooth light surface marks, the kind of fine hairlines that catch light at an angle. It cannot fix deep gouges, dents, or case deformation, and trying to force it there usually makes things worse.
Before you touch polish to metal, identify which surfaces are brushed and which are polished. Mixing them up, even briefly, dulls a finish that took a machine tool to create.
- Clean the area fully first. Polishing over grit just adds new scratches.
- Mask adjacent brushed sections with tape.
- Use a small amount of cream on an applicator pad, working in the direction of the metal’s grain.
- Buff lightly, then wipe the area clean of residue before inspecting under good light.
Over-polishing is the real risk here. Repeated aggressive polishing softens lugs, erases bevels and hallmarks, and measurably lowers a piece’s value to collectors who notice when an edge has gone soft. Photograph any vintage or high-value watch before polishing so you have a record of the original edges.
Pro Tip: If a scratch catches your fingernail when you drag it across, that’s not a job for polishing cream. That depth needs a bench jeweler with proper refinishing tools.
How Often Should You Clean and Maintain a Luxury Watch?
Consistency beats intensity here. A light daily habit protects a watch more than one aggressive annual session ever could.
| Point | Details |
|---|---|
| Daily | Wipe the case and bracelet with a microfiber cloth to remove skin oils and dust. |
| Monthly or biweekly | Give frequently worn, water-resistant watches a deeper clean with brush and mild solution. |
| After salt, sunscreen, or heavy sweat | Rinse promptly in fresh water if resistance allows, then dry fully. |
| Every one to two years | Schedule a professional pressure test and gasket check, especially for pieces worn near water. |
A quick dust-off habit does more long-term good than most people expect. The daily upkeep habits that take thirty seconds a day are the ones that actually prevent the buildup that leads to a rushed, over-aggressive clean later.
Signs You Need a Watchmaker, Not a Home Fix
Some problems are outside what any kit can safely address. Recognizing them early saves you from making a small issue into an expensive one.
- Condensation or fogging under the crystal means water has gotten past a seal. Stop, don’t wind or run the watch, and get it to a watchmaker immediately.
- If polishing has already softened an edge, rounded a bevel, or blurred a hallmark, stop polishing and consult a professional about refinishing options.
- A loose pin, screw, or clasp mechanism needs a service center. Forcing it back into place at home often damages the surrounding metal.
- Any watch with an unknown or expired pressure test rating should get one before it goes back in water, along with a gasket replacement if the watchmaker recommends it.
Author and ChronoCare Proof Points
This guide is written by Raymond Jenkins.
Collectors consistently underestimate how much a conservative, repeated cleaning routine outperforms one aggressive session. The watches that hold their value longest are the ones treated gently, often.
ChronoCare specializes in cleaning, polishing, and strap-care formulas built specifically for luxury timepieces, drawing on [brand_signal] and customer feedback gathered through [internal_data].
A Component-by-Component Walkthrough for First-Timers
Start with the microfiber cloth. Before any solution touches the watch, a dry wipe removes loose dust that would otherwise turn into fine scratching grit once you introduce moisture. Next comes the cleaning solution, applied to the brush rather than directly onto the watch, and worked in short strokes across the bracelet and case back where oils accumulate fastest.
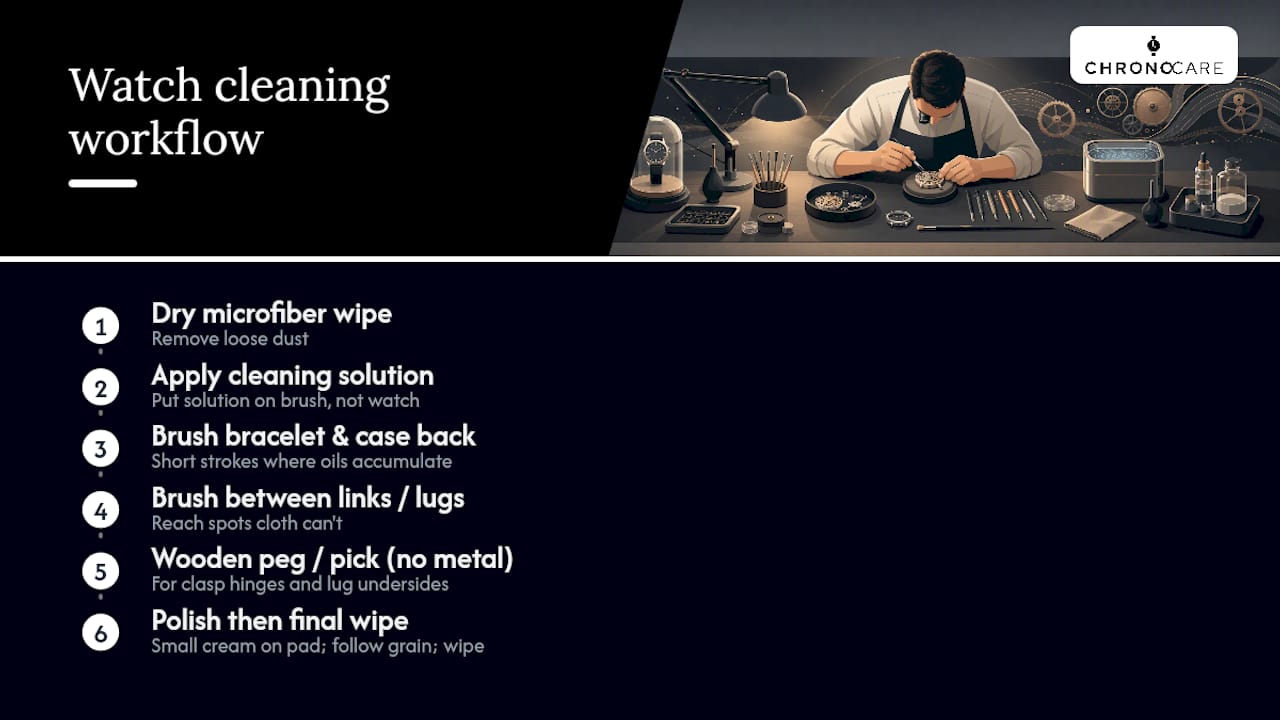
The soft brush earns its place between links and around lugs, spots a cloth alone can’t reach. Once you’ve brushed and rinsed, dry immediately. Trapped moisture between bracelet links is where corrosion starts on lower-grade metals, and even solid stainless steel can develop water spotting if left damp.
Pegwood or a wooden toothpick comes next, reserved for clasp hinges and the underside of lugs where the brush can’t fully seat. Never substitute metal tools here. Metal picks scratch case metal almost instantly.
Polishing cream comes last, and only if the watch actually needs it. Apply a small amount to an applicator pad, not the watch directly, and work in controlled, grain-following strokes. Finish with a final wipe using a clean section of microfiber to remove all residue. A complete overview of care techniques and materials covers how each product interacts with different metal finishes if you want more detail before starting.
How to Open and Close a Watch Case Without Causing Damage
Most restoration work never requires opening the case, and that’s by design. If you’re only cleaning, polishing, or conditioning straps, the case stays closed the entire time. Opening a case back is a job for pressure testing, battery work, or movement service, not routine cosmetic care.
If your kit or process does call for removing a case back (some snap-back designs allow strap or bracelet access), use a dedicated case-back opener sized correctly for the notches or knife-edge, never a flathead screwdriver improvised from a toolbox. Applying pressure at the wrong angle can slip and gouge the case edge or crystal.
Screw-down case backs need a case wrench with pegs matched to the specific notch pattern. Forcing a wrench that doesn’t fit rounds off the notches, which then makes every future opening harder and eventually requires a watchmaker to correct.
Before closing anything, confirm the gasket sits properly seated in its groove with no twist or pinch. A pinched gasket is one of the most common causes of water resistance failure after an amateur case opening. Close by pressing straight down evenly, never at an angle, and confirm the case back seats flush all the way around before applying any pressure test.
If any of this feels uncertain, that’s the signal to stop. Case work is where most home restoration mistakes turn expensive.
Tools Beyond the Kit Worth Having on Hand
A restoration kit covers cleaning and polishing, but a few extra tools make the whole process smoother and safer. A case knife or spring bar tool lets you remove straps and bracelets without prying at leather or metal with whatever’s nearby, which is how most strap lugs get scratched.
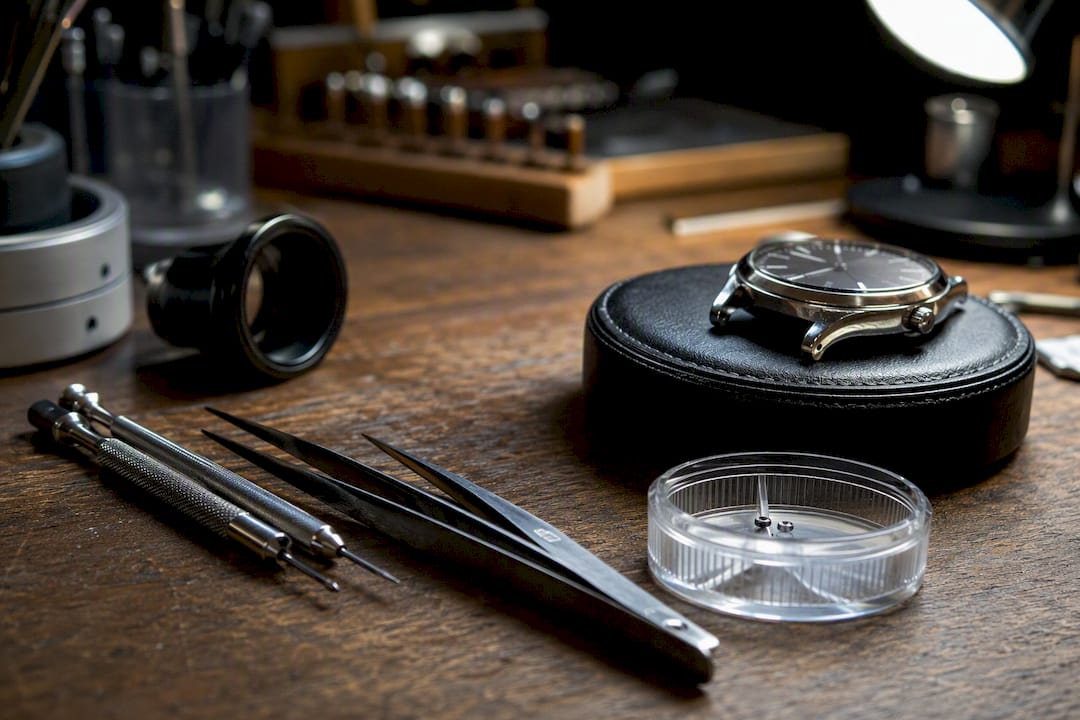
A small loupe or jeweler’s magnifier matters more than people expect. Surface marks that look uniform to the naked eye often turn out to be several different depths under magnification, information that changes whether polishing is even appropriate. A soft rubber watch case holder or cushioned tray keeps the watch from rolling or sliding while you work, especially important with round cases that have no flat resting side.
Painter’s tape, already mentioned for masking finishes during polishing, doubles as crystal protection if you’re doing bracelet work near the case. A small parts tray or magnetic dish keeps screws and spring bars from disappearing into carpet fibers, a genuinely common and avoidable loss.
For anyone working on gem-set pieces or watches with stone-accented bezels, the cleaning approach shifts again. Gemstones can loosen in their settings, and safe gemstone jewelry cleaning practices apply the same caution: check settings before cleaning, and avoid ultrasonic devices on stones with inclusions or treatments that heat or vibration could affect.
Common Mistakes That Damage Watches During Restoration
The single most common error is skipping the water-resistance check and cleaning a vintage piece the same way you’d clean a modern dive watch. Seals degrade over decades whether or not the watch has ever been submerged, and assuming resistance based on the watch’s original spec sheet ignores forty years of gasket wear.
A close second: using paper towels or tissue instead of microfiber. Paper products contain wood fibers that scratch polished metal on contact, even when the surface looks smooth.
Over-polishing ranks high too, particularly the habit of polishing every time a watch is cleaned rather than reserving polish for actual scratches. Frequent unnecessary polishing is how sharp case edges turn soft over a few years.
Mixing cleaning solution and polishing cream into the same cloth or pad causes cross-contamination that leaves faint residue streaks. Keep tools segregated by task. Soaking a leather strap because it was easier than removing it first is another frequent misstep, one that shows up months later as cracked, dried leather that no amount of conditioner reverses.
Finally, working without adequate light and magnification means missing existing damage, chips, hairline cracks, before you start, then wrongly assuming your cleaning process caused something that was already there. A full restoration walkthrough covers these pitfalls in more depth if you’re working on a pre-owned piece with unknown history.
Handling the Movement Safely During Any Cleaning
The movement, the mechanical or quartz engine inside the case, should never make direct contact with any cleaning product in a home restoration session. Every step in this guide assumes the case stays closed and the movement stays sealed away from cleaning solution, water, and polish.
If moisture or polish residue ever reaches the movement through a compromised seal, that’s no longer a cleaning task. Fine particles from polishing compound are especially damaging if they migrate past a gasket, since they can work into pivot points and gear teeth where they cause abrasive wear over time.
The practical takeaway is straightforward: home restoration kits are built for the exterior only. If you notice the second hand stuttering, a loss of accuracy, or any moisture inside the crystal after cleaning, that’s the movement signaling a problem, and it needs a watchmaker’s bench, not another round of cloth and solution.
Checking Your Watch After a Restoration Session
Before you consider a cleaning or polishing session finished, run a quick functional check. Confirm the crown moves smoothly through its positions and screws down fully if it’s a screw-down type. A crown that feels gritty or resistant after cleaning may have picked up residue that needs a final wipe.
Check that the date changes correctly at midnight if applicable, and that the second hand sweeps smoothly with no visible catch or stutter. Wind a manual watch fully, or give an automatic a few wrist shakes, and confirm it’s keeping reasonably steady time over the next hour compared to a phone clock.
Inspect the crystal for any new haze or scratching that wasn’t there before, a sign that polishing cream migrated somewhere it shouldn’t have. Check the bracelet or strap sits properly with no twisted links or misaligned holes from reassembly.
If everything checks out, you’ve completed a full cycle. If something feels off, mechanically or cosmetically, that’s the signal to stop further home intervention and get a professional opinion before wearing the watch again.
The Honest Take on Home Watch Restoration
Most advice on this topic leans too far in one direction or the other: either treating every luxury watch like it needs monthly professional service, or treating a home kit like it can fix anything short of a shattered crystal. Neither is right. The research on this consistently points to a middle path: simple, low-abrasion steps applied repeatedly outperform occasional aggressive cleaning sessions, and that finding cuts against a lot of collector instinct.
The conventional wisdom that fails readers most often is the assumption that polishing is a routine cosmetic step, something you do every time a watch looks tired. It isn’t. Polishing removes metal permanently, and a watch polished five times over a decade looks noticeably softer at the edges than one cleaned five times and polished once.
If you take one thing from this guide, prioritize the precheck over everything else. A watch with an unverified water-resistance rating and a rushed cleaning routine is a liability, no matter how good your kit is. Confirm the crown, confirm the seals, then clean often and polish rarely. That order of operations protects more value than any single product choice.
— Raymond Jenkins
Where ChronoCare Kits Fit Into This Process
Every step in this guide maps directly to what’s actually in a ChronoCare kit, not the other way around. The Ultimate Watch Cleaning Kit is built around the exact cleaning tier described earlier: microfiber cloths, a soft detail brush, and a mild solution formulated to lift oils and grime without touching gaskets or finishes the way harsher household cleaners can.
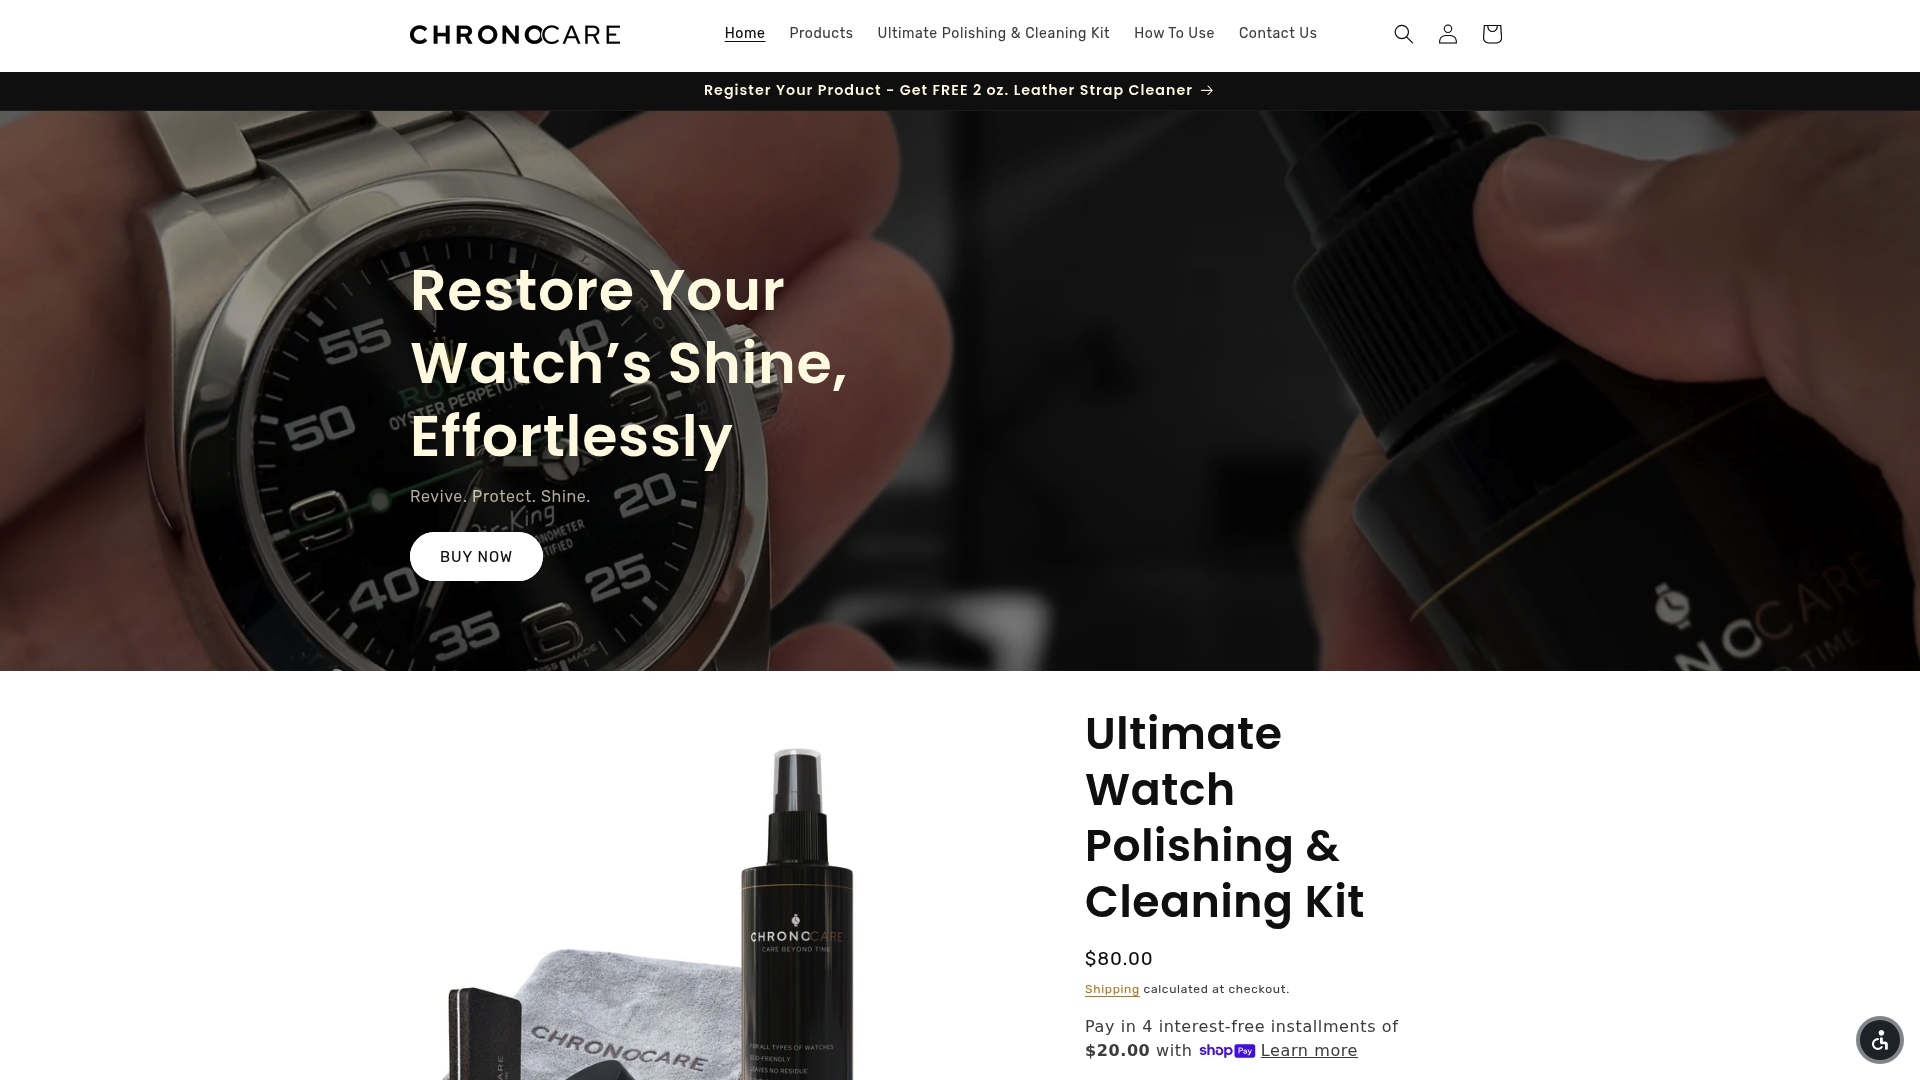
For the polishing steps covered above, the Ultimate Watch Polishing & Cleaning Kit pairs cleaning tools with a polishing cream and applicator pads sized for controlled, small-section work, the same approach this guide recommends for protecting bevels and hallmarks. If you already have cleaning supplies and only need to address light surface marks, the standalone watch polishing cream removes hairline scratches without the broader cleaning bundle.
ChronoCare backs its kits with usage guides and a satisfaction guarantee, so if a formula doesn’t suit your watch’s specific metal or finish, support is available rather than a guessing game. Start with the cleaning kit if you’re new to home maintenance, or step up to the polishing bundle if your collection includes pieces with visible surface marks. Either way, check the product page for the kit that matches what your watch actually needs.
Key Takeaways
Conservative, repeated care beats aggressive one-time cleaning for preserving both a luxury watch’s finish and its collector value.
| Point | Details |
|---|---|
| Precheck before wet cleaning | Confirm water resistance and secure the crown before any water touches the watch. |
| Detach bracelets when possible | Soak for 10 to 15 minutes in lukewarm water with a drop of neutral dish soap. |
| Polish rarely, clean often | Reserve polishing cream for light surface marks only, never as a routine step. |
| Match tools to materials | Leather needs damp wiping only, rubber tolerates soaking, and metal needs full drying before reassembly. |
| ChronoCare kits match each step | The Ultimate Watch Cleaning Kit and Ultimate Watch Polishing & Cleaning Kit are built around this exact cleaning and polishing sequence. |
Sources
- How to clean a watch — Longines
- How to clean a luxury watch at home — Toronto Watch Exchange
- How to clean your watch — Hodinkee