

DIY Watch Restoration Common Mistakes to Avoid
DIY watch restoration common mistakes are actions that cause physical damage, devalue a timepiece, or create faults requiring expensive professional correction. Amateur repairs frequently cost an average of £239 to fix professionally, a figure that reflects how badly things go when enthusiasm outpaces technique. The industry term for what most enthusiasts attempt is “amateur horological servicing,” and understanding where it goes wrong is the fastest way to get it right. Vintage watches are especially unforgiving. A single misstep with the wrong tool or the wrong lubricant can permanently destroy a movement that took decades to develop its character.
1. DIY watch restoration common mistakes start with the wrong tools
Using household tools on a watch movement is the single fastest way to cause irreversible damage. Kitchen knives used as case openers slip and gouge case backs. Standard screwdrivers strip screw heads in seconds because watch screws require hardened steel drivers sized to within fractions of a millimeter. A 10x loupe is not optional equipment. Without magnification, you cannot see what you are doing inside a movement, and you will not notice a misaligned jewel or a bent pivot until the watch stops working.
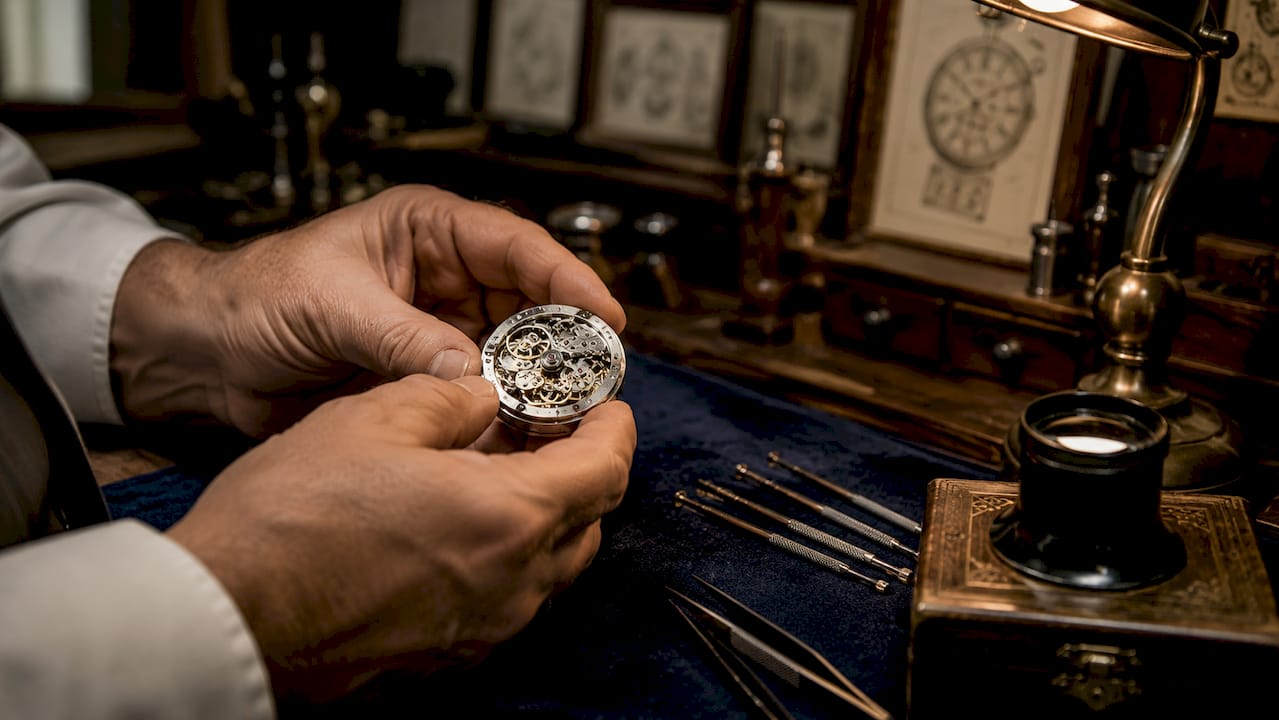
The environment matters just as much as the tools. Dust and moisture in home environments mix with lubricants inside a movement and form an abrasive paste that grinds components over time. Professional watchmaking facilities use HEPA filtration and positive-pressure benches to prevent exactly this. Skin oils from bare hands transfer to movement components and accelerate corrosion on brass bridges and steel wheels.
A movement holder is not a luxury. Without one, tiny screws, springs, and jewels roll off the bench and disappear. Most beginners lose at least one component this way on their first attempt.
- Use only hardened steel screwdrivers sized to each screw head
- Work on a lint-free mat under a dust cover when not actively working
- Wear nitrile gloves or finger cots to prevent oil transfer
- Use a 10x loupe minimum; a stereo microscope is better for vintage movements
- Keep a movement holder and parts tray within arm’s reach at all times
Pro Tip: Set up your workspace near a window for natural light, but close it to block dust. A simple acrylic dome cover over your work area cuts contamination dramatically without requiring a full clean room.
2. Lubrication errors that ruin mechanical movements
Over-lubrication is the most common error in amateur watch servicing, and it causes more damage than no lubrication at all. Excess oil migrates across surfaces, reaches the escapement, and gums the pallet fork and escape wheel. The result is a watch that runs slow, stops intermittently, or loses amplitude until it stops entirely. Less oil is always safer than more.
Wrong oil type is the second major error. Mechanical watches require multiple specific lubricants: a thin oil for the escapement, a thicker grease for the keyless works, and a dedicated epilame treatment for certain components to prevent oil spreading. Using a single general-purpose oil on every part creates drag on high-speed components and failure on slow-moving ones. Old, oxidized oil must be fully removed before any new lubricant goes on. Applying fresh oil on top of degraded oil does not restore function. It creates a contaminated mixture that performs worse than either substance alone.
Micro-oilers are the correct application tool. A standard pin or toothpick deposits far too much oil in one spot. The goal is a single, barely visible droplet on each jewel cup.
- Remove all old lubricant with an ultrasonic cleaner or appropriate watch cleaning solution before relubrication
- Use clock and watch-specific oils only, never sewing machine oil or WD-40
- Apply oil with a micro-oiler, not a pin or brush
- Treat the escapement last and use the smallest possible quantity
- Check for oil pooling under magnification before reassembling
Pro Tip: After oiling each jewel, look at it under your loupe. The oil should sit as a tiny dome inside the jewel cup. If it spreads flat or runs onto the bridge, you have applied too much.
3. Handling delicate parts: dials, hands, crystals, and date mechanisms
Removing hands and dials is one of the highest-risk steps in any restoration. Hand-lifting tools must be padded to avoid denting the dial surface. Even slight pressure in the wrong spot leaves a permanent mark on a vintage lacquered dial, and selective restoration that preserves original dials is the standard in 70% of vintage watch cases. That statistic reflects a clear industry consensus: original surfaces hold more value than restored ones.
Crystal assessment before polishing is a step most beginners skip entirely. The fingernail test is the correct starting point. Run your fingernail across the scratch. If it catches, the scratch is deep enough to compromise crystal integrity and is not suitable for DIY polishing. Attempting to buff out a deep scratch thins the crystal unevenly and risks cracking it under normal use.
Date mechanism damage is almost always caused by setting the date at the wrong time. Setting the date between 9 PM and 3 AM engages two separate date-change mechanisms simultaneously, which causes jamming and can strip the date wheel teeth permanently. Always set the date with the hands at 6 o’clock to avoid this window entirely.
- Never touch a dial surface with bare fingers
- Use padded hand-lifting levers and work slowly
- Run the fingernail test before attempting any crystal polishing
- Set the date only when the hands are positioned at 6 o’clock
- Preserve original patina on vintage dials rather than cleaning aggressively
4. Battery replacement and case resealing errors
Quartz watch batteries last between 1 and 3 years under normal use, with some high-efficiency movements reaching 5 years. Waiting too long causes battery leakage. Leaked battery acid corrodes the movement’s circuit board and contact springs, and that damage is permanent. Replacing a battery on schedule costs a few dollars. Repairing acid corrosion costs far more, and in many cases the movement cannot be saved at all.
Case opening and resealing introduce their own set of risks. Many enthusiasts use WD-40 or silicone spray on case back gaskets. Both are wrong choices. WD-40 degrades rubber gaskets and destroys water resistance. The correct material is a dedicated watch gasket grease applied in a thin, even coat. Resealing the case back requires a case press with the correct die size. Without even pressure distribution, the crystal cracks under uneven load. This is one of the most expensive DIY errors to fix because crystal replacement requires sourcing the correct size and material for the specific reference.
Uneven pressure during resealing is a leading cause of cracked crystals. Experts consistently warn that a proper case press with a matched die is the only safe way to close a case back without risking the crystal. Finger pressure and rubber mallets are not substitutes.
After resealing, fogging on the inside of the crystal is a clear sign that moisture is trapped inside the case. That moisture will corrode the movement over weeks. If you see fogging, the case must be opened and dried immediately.
5. Timing, regulation, and testing without proper equipment
Regulating a mechanical watch without a timing machine is not possible. Calibration requires a timing machine; adjusting by ear or by comparing to a phone clock produces results that are unreliable and often worse than the original state. A timing machine, commonly called a Timegrapher, measures amplitude, beat error, and rate simultaneously. Without those three readings, you cannot know whether an adjustment improved or worsened performance.
Beat error is the most misunderstood metric among beginners. A watch with a beat error above 1.0 milliseconds will run erratically regardless of how well it is lubricated or regulated. Correcting beat error requires adjusting the position of the impulse pin relative to the pallet fork, a task that demands both a Timegrapher and significant hands-on experience. Attempting it without both risks bending the pallet fork and destroying the escapement.
The practical rule for DIY enthusiasts is clear. You can perform meaningful checks: visual inspection, cleaning, basic lubrication, and case maintenance. Regulation and amplitude adjustment belong with a professional unless you own a Timegrapher and have practiced on donor movements first. A standard mechanical service is recommended every 3 to 5 years regardless of DIY work performed between intervals.
- Do not attempt regulation without a Timegrapher
- Measure amplitude and beat error before and after any service
- Leave escapement adjustment to a professional if you lack timing equipment
- Use a phone-based Timegrapher app only as a rough diagnostic, not for final regulation
- Schedule professional service every 3 to 5 years even with regular DIY maintenance
Key takeaways
Avoiding DIY watch restoration common mistakes requires the right tools, correct lubricants, a clean workspace, and an honest assessment of which tasks exceed your current skill level.
| Point | Details |
|---|---|
| Use proper tools only | Hardened steel drivers, a 10x loupe, and a movement holder prevent the most common physical damage. |
| Apply minimal lubrication | Over-oiling gums the escapement; use a micro-oiler and apply one small droplet per jewel cup. |
| Preserve original surfaces | Original dials and patina hold more value than restored ones; avoid aggressive cleaning on vintage pieces. |
| Replace batteries on schedule | Quartz batteries last 1–3 years; delayed replacement risks permanent acid corrosion to the movement. |
| Leave regulation to professionals | Without a Timegrapher, timing adjustments worsen performance more often than they improve it. |
What I’ve learned from watching enthusiasts make the same errors
The most damaging mistake I see is not a technical one. It is impatience. Enthusiasts open a movement for the first time, see a dirty mainspring or a slow rate, and immediately start adjusting things. They have not yet learned what “normal” looks like, so they cannot recognize when they are making things worse.
The second pattern I see constantly is over-investment in the result before developing the skill. Someone buys a valuable vintage piece and decides to restore it themselves before they have practiced on inexpensive donor movements. That is backwards. Practice on movements you can afford to destroy. The watch restoration skills that protect valuable pieces are built on movements that did not matter.
Preservation versus restoration is also misunderstood. The goal with a vintage watch is almost never to make it look new. Original patina, original dials, and original case finishing are what collectors pay for. Polishing a case to a mirror finish on a 1960s sports watch destroys its value. The correct mindset is to service the movement and leave the exterior alone unless there is a specific, targeted reason to address it.
My honest advice: build a relationship with a professional watchmaker before you need one urgently. Ask questions. Most good watchmakers respect enthusiasts who approach them with genuine curiosity. That relationship will save you money and save your watches.
— Raymond Jenkins
ChronoCare’s tools for safer DIY watch care
Protecting a vintage watch during any cleaning or polishing step starts with using products formulated for the task.
ChronoCare’s Ultimate Watch Cleaning Kit gives enthusiasts a professional-grade starting point for case and bracelet care without risking the movement or seals. For collectors dealing with surface scratches on metal cases, the Watch Polishing Cream removes light marks without thinning the metal or altering brushed finishes. Both products are formulated in the US and designed to work with the maintenance practices that keep luxury timepieces in their best condition between professional services.
FAQ
What is the most common DIY watch repair mistake?
Over-lubrication is the most common error in amateur watch servicing. Excess oil migrates to the escapement, causes drag, and stops the watch from running accurately.
When should I set the date on a watch with a quick-set mechanism?
Set the date only when the watch hands are at the 6 o’clock position. Setting the date between 9 PM and 3 AM engages two mechanisms at once and risks jamming or stripping the date wheel.
How often does a mechanical watch need professional servicing?
Professional service is recommended every 3 to 5 years for mechanical watches. DIY cleaning and maintenance between intervals does not replace a full movement service.
Can I polish a scratched watch crystal at home?
Use the fingernail test first. If your nail catches in the scratch, the damage is too deep for safe DIY polishing and the crystal should be replaced professionally to avoid cracking.
What happens if I reseal a watch case incorrectly?
Uneven pressure during resealing can crack the crystal. Always use a case press with the correct die, and inspect the gasket for damage before closing the case.