

Protect Chamfers When Polishing a Stainless Steel Watch, For Owners
Yes, you can polish a stainless steel watch at home, but only under specific conditions: the case must be uncoated (no DLC, PVD, or plating), the scratches must be shallow, and you must protect the chamfers before you touch a single abrasive to the metal. The rule that governs everything else: remove the least amount of metal necessary, and mask every edge you’re not actively working.
TL;DR:
- Only shallow scratches on uncoated stainless steel cases can be addressed at home, and masking edges is crucial to avoid rounding chamfers.
- Deep scratches, coated surfaces, vintage pieces, or watches with gemstones should always be handled by professional restorers to prevent irreparable damage.
- Different steel grades and finishes require tailored polishing techniques; 316L is forgiving, while 904L needs more patience and care during polishing.
- A proper abrasive sequence from 600 to 3000 grit followed by specific compounds produces the best mirror finish and minimizes swirl marks.
- Masking tape, controlled polishing stages, and careful technique are the main tools for achieving factory-like results without harming delicate edges.
Table of Contents
- When to Polish vs When to Seek a Professional
- How Steel Grade and Finish Type Change Your Approach
- Tools, Abrasives, and Compounds That Work for Stainless Steel
- Step-by-Step: Restoring a Mirror-Polished Surface
- Step-by-Step: Refinishing a Brushed Surface
- Protecting Chamfers, Edges, and Delicate Details
- Finishing, Residue Removal, and Aftercare
- Author Expertise and the Limits of DIY Restoration
- What Most DIY Guides Get Wrong About Polishing
- Choosing the Right ChronoCare Kit for Your Repair
- Sources
When to Polish vs When to Seek a Professional
Run your fingernail across the scratch. If your nail catches or drags, the mark has real depth and you’re looking at material removal that goes beyond a quick buff. If your nail glides over it smoothly, you’re dealing with a surface-level mark that abrasive polishing can usually erase in a few passes. This test isn’t scientific, but it’s the same triage watchmakers use before deciding how aggressive to get.
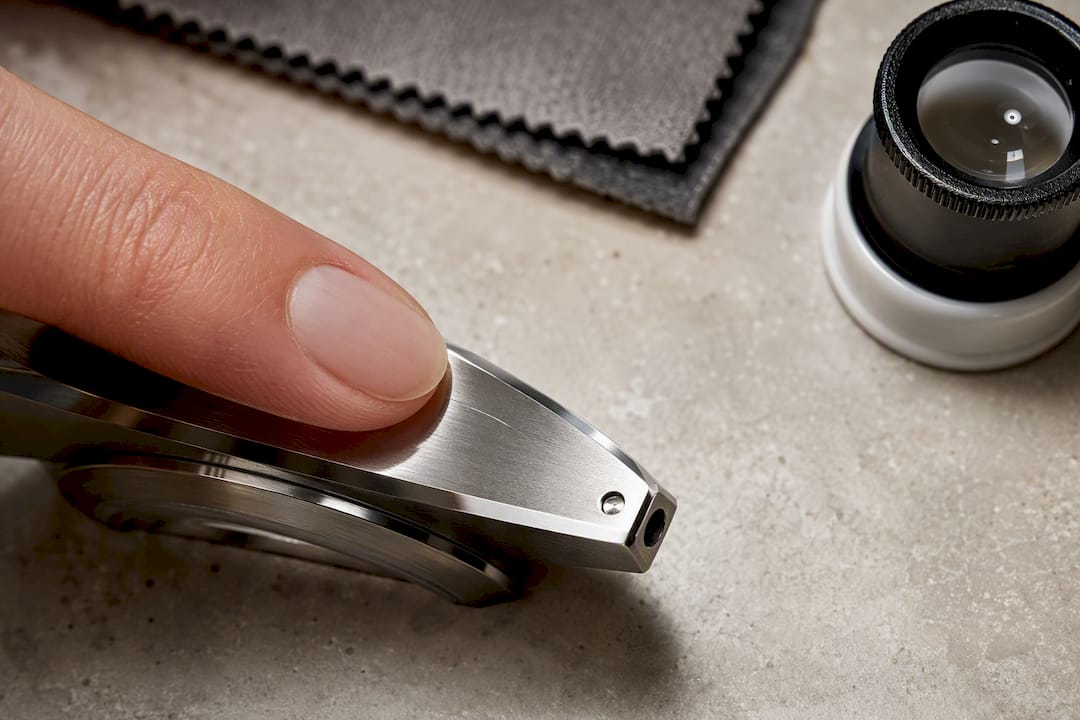
Depth matters because polishing works by removing microscopic layers of metal to level the surrounding surface down to the depth of the scratch. A hairline mark might need thirty seconds of compound work. A deep gouge might require enough material removal that you’d visibly alter the case’s proportions before the scratch disappears. That’s the trade nobody tells you about: every polish job is a small, permanent subtraction from the watch.
Over-polishing is where most DIY attempts go wrong, and the damage shows up in the edges before it shows up anywhere else. Chamfers, those crisp beveled transitions between the case flank and the lug tops, are thin by design. A few careless passes with a buffing wheel can round them into a soft, generic curve, and there’s no walking that back. Once a chamfer loses its edge, refinishing can’t recreate the angle, because the metal that defined it is gone.
Certain watches simply don’t belong on your workbench, no matter how confident you feel with a polishing cloth:
- Coated or plated cases — DLC, PVD, and IP finishes are microns thick. A single pass with even a mild compound can burn through the coating and expose bare steel underneath, leaving a patch that no home fix can blend back in.
- Vintage and collector pieces — Original finish is often the single biggest driver of resale value. Sending a 1960s dive watch through a home buffing wheel can cut its value in half, even if the surface looks “better” afterward.
- Watches with gem-set bezels or engraving — Abrasive contact near stones or engraved lines risks dislodging settings or blurring detail that can’t be re-cut at home.
- Anything under warranty repair — Some manufacturers void service warranties if they detect non-factory refinishing.
If your watch falls into any of those categories, a professional restoration service that uses calibrated equipment and case-specific jigs is the safer route. For everything else, uncoated 316L or 904L steel with shallow, cosmetic scratching, you have a legitimate DIY project ahead of you.
How Steel Grade and Finish Type Change Your Approach
Not all stainless steel behaves the same way under an abrasive pad, and knowing which grade you’re working with changes your entire strategy.
316L is the workhorse alloy most watch cases are made from. It’s forgiving, moderately hard, and takes a polish predictably with standard abrasive progressions. 904L, used by a handful of higher-end manufacturers, is more corrosion-resistant and tends to take a mirror polish to a higher degree of brightness than 316L, but that same reflectivity means fresh scratches show up faster and more visibly. If your watch is 904L, plan on a slower, more patient polishing sequence, because mistakes are harder to hide once the surface catches light. Titanium, meanwhile, is softer and scratches more easily than either steel grade, but it also work-hardens faster under heat from a rotary tool, which changes how compounds behave on it.
Finish type matters just as much as alloy:
- Mirror-polished surfaces are smooth, reflective, and forgiving of straight-line polishing strokes, but they show every swirl mark under angled light, so technique consistency matters more than raw effort.
- Brushed (satin) finishes have a linear grain cut into the metal during manufacturing, and that grain has to be recreated in the exact same direction or the repair will be visible as a mismatched patch.
- Sunburst and vertically brushed dials are almost never candidates for home polishing; they’re often applied to thin metal or coated components that can’t tolerate abrasive contact.
- Bead-blasted or matte finishes require specialized media (glass bead or fine sand) rather than cloth-and-compound polishing, and most home setups can’t replicate that texture convincingly.
The practical takeaway: identify your finish before you identify your scratch. A brushed case bracelet link and a polished case flank sitting three millimeters apart need two completely different techniques, and blending one into the other is the single most common mistake in home watch restoration.
Tools, Abrasives, and Compounds That Work for Stainless Steel
Grit progression is the backbone of every successful polish job, and skipping steps is the fastest way to leave visible swirl marks under the very shine you’re trying to create.
A typical sequence for stainless steel starts at moderate grit and works upward: sandpaper or micro-mesh in the 600 to 1500 range removes the scratch itself and any surrounding disturbance, then progressively finer grits up to 3000 or higher smooth out the marks left by the coarser abrasive. Only after the surface is uniformly fine do you move to compound polishing, typically starting with a cutting compound like white diamond and finishing with a lighter polish such as green chromium oxide for final brightness.
Compound choice depends on what you’re trying to accomplish at each stage:
- White diamond compound cuts moderately and works well for the transition step between sanding and final polish.
- Green chromium oxide is a finer finishing compound suited to mirror surfaces on stainless steel.
- Scotch-Brite pads (gray or maroon grades) recreate brushed texture and work micro-scratches out of satin finishes without adding shine where you don’t want it.
- Garryflex blocks are abrasive rubber blocks favored by watchmakers for controlled, low-pressure brushed refinishing.
- Cotton buffing wheels or felt bobs mounted on a rotary tool deliver compound to mirror surfaces evenly across curves.
Cross-contamination ruins more polish jobs than bad technique does. If a mop or wheel that’s been used with a coarse compound touches a fine-compound stage, it drags coarse grit into your final pass and reintroduces the scratching you just spent twenty minutes removing. Watchmakers keep separate mops for each compound and store them individually, never in the same tray or bag.
If you’re using a rotary tool like a Dremel, speed control matters more than most people assume. Running a cotton wheel at 5,000 to 8,000 RPM with light pressure gives you enough cutting action without generating the heat buildup that comes from higher speeds. Push past that range and you risk warping thin case sections or discoloring the steel from friction heat.
Gear up before you start: nitrile gloves keep compound and oil off your hands and off the watch, safety glasses matter more than they seem to when a buffing wheel flings compound at eye level, and a dust mask is worth it if you’re sanding dry rather than wet. For masking, use polyimide tape (often sold as Kapton tape) on any edge you want to protect completely, since it resists heat and tears cleanly, and reserve standard painter’s tape for larger flat areas where precision matters less.
Pro Tip: Keep a magnifying loupe or a jeweler’s headband magnifier on hand during every stage. What looks flawless to the naked eye at arm’s length often reveals swirl marks or missed spots the moment you get closer, and catching that early saves you from redoing an entire pass.
Step-by-Step: Restoring a Mirror-Polished Surface
Light surface scratches on uncoated stainless steel respond well to a controlled abrasive progression followed by polishing compound, and most home attempts fail not from lack of skill but from rushing the sequence.
1. Strip the watch down to bare essentials. Remove the bracelet or strap entirely if your case design allows it. Push the crown in fully and, if your watch has a screw-down crown, make sure it’s locked. Any exposed seams or gaps are places compound and grit can lodge.
2. Mask everything you’re not actively polishing. Cover the crystal completely with painter’s tape, and run polyimide tape along every chamfer, bevel, and engraved marking near your work area. This step alone prevents most of the damage that ruins home polish jobs.
3. Clean the case first. A quick pass with mild soap and a soft brush removes surface oils and grit that would otherwise get dragged across the metal by your first abrasive pass, scratching the case before you’ve even started your repair.
4. Begin at moderate grit. Using 600 to 1000 grit micro-mesh or sandpaper, work in straight, consistent strokes directly over the scratch, extending slightly beyond its edges to blend the repair into the surrounding metal. Stop and check your progress every ten to fifteen strokes.
5. Step up through finer grits. Move to 1500, then 2000, then 3000 grit, cleaning the surface between each grit change so you’re not dragging coarser particles into the finer stage. Each grit should erase the visible marks left by the one before it.
6. Apply cutting compound. A small amount of white diamond compound on a felt bob or soft cloth, worked in small circular or straight motions depending on your case geometry, starts building back the reflective surface.
7. Finish with polishing compound. Switch to a dedicated finishing mop and green chromium oxide compound for the final brightness pass. This is where the mirror shine actually returns.
8. Inspect under raking light. Angle a bright light source across the case at a low angle rather than straight on. Raking light reveals swirl marks and uneven spots that overhead light hides completely.
9. Remove masking and clean thoroughly. Peel tape slowly to avoid adhesive residue, then wash the case with mild soap and warm water to clear any remaining compound from seams and crevices.
Patience is the discipline that separates a clean repair from a visible one. Early missteps in the abrasive sequence can’t be corrected later; if you rush the 600 grit stage, no amount of careful compound work at the end will hide the coarse scratches hiding underneath your shine. Watchmakers describe the goal as leaving “no evidence of intervention,” meaning the finish should look refreshed, not reworked.
Step-by-Step: Refinishing a Brushed Surface
Brushed finishes carry a linear grain that was cut into the metal during manufacturing, and the entire technique here revolves around matching that direction exactly. Get it wrong and the repair reads as a visible patch even from across a room.
1. Identify the grain direction before touching anything. Look at the surrounding brushed area under angled light and note which way the lines run, whether that’s straight along the case flank or radiating outward from a specific point.
2. Mask the polished edges completely. Brushed and mirror-polished surfaces almost always sit right next to each other on a modern watch case, and polyimide tape along that boundary keeps your Scotch-Brite pad from accidentally dulling a chamfer or bevel that’s supposed to stay reflective.
3. Select the right pad grade. Gray Scotch-Brite pads suit finer, tighter grain patterns, while maroon pads cut slightly more aggressively for deeper marks. A Garryflex block gives you more control on flatter surfaces where consistent pressure matters most.
4. Work in single, deliberate strokes. Pull the pad in one direction only, following the established grain, rather than scrubbing back and forth. Back-and-forth motion is the single most common cause of cross-hatched, mismatched brushing.
5. Replace pads before they load up with metal debris. A worn or clogged pad drags rather than cuts cleanly, and it can leave inconsistent texture instead of the fine, even lines you’re after.
6. Work section by section rather than the whole case at once. Restoring small links on a bracelet often works better with selective masking and folding techniques rather than full disassembly, letting you finish individual links without disturbing the polished sleeves next to them.
7. Check your match against an unaffected area. Hold the repaired section next to an untouched brushed area under the same light angle. If the grain direction and depth look continuous, you’re done. If there’s a visible seam, keep refining that transition zone specifically.
8. Clean off metal dust and pad residue. A soft brush and mild soap clear particulate that Scotch-Brite pads leave behind, which otherwise settles into the grain lines and dulls the finish over time.
A dedicated guide to brushed finish restoration covers bracelet-specific techniques in more depth if your watch has a fully brushed metal band rather than just a brushed case.
Pro Tip: Practice your linear stroke technique on the caseback first if it’s brushed and less visible than the sides. It’s the lowest-stakes surface on the watch to build muscle memory before you move to a spot everyone actually sees.
Protecting Chamfers, Edges, and Delicate Details
Chamfers are the single most vulnerable feature on any stainless steel watch case, and they’re also the feature most home polishers destroy without realizing it until it’s too late. The bevel connecting a case’s top surface to its flank is often less than a millimeter wide, and it defines how the watch catches light and reads visually on the wrist. Round it off with even a modest amount of unintended abrasive contact, and no amount of later work restores that crisp geometry.
The fix is almost entirely about discipline with tape, not skill with abrasives. Polyimide tape, the same heat-resistant tape used in electronics work, holds its shape around tight curves and resists tearing when you’re working close to an edge with a spinning wheel. Painter’s tape works fine for broader, flatter zones where a slip wouldn’t cause real damage, but it stretches and peels at corners in a way that leaves gaps precisely where you need coverage most.
A few masking habits separate a clean job from a ruined one:
- Apply tape in overlapping strips rather than one continuous piece, so seams don’t create a weak point where compound can sneak underneath.
- Run a fingernail firmly along every taped edge before you start polishing, sealing down any lifted corners.
- Re-tape between abrasive stages rather than trusting one application to survive the entire process; tape degrades and lifts faster than most people expect under repeated contact.
- Leave a slightly wider tape margin than you think you need. It’s far easier to polish a tiny bit closer to a masked line than to fix a chamfer you accidentally caught.
Some details are simply outside the scope of home polishing, no matter how careful your masking is. Engraved case backs, gem-set bezels, and any area with fine printed text should stay away from abrasive contact entirely, since a single stray pass can blur a line or loosen a stone setting that took a jeweler real skill to install. If your watch has any of these features near the area you’re repairing, treat that as your cue to mask far more conservatively than usual, or to hand the job to a professional instead.
Finishing, Residue Removal, and Aftercare
Compound residue left in case seams and lug gaps is the most overlooked step in home polishing, and it’s the reason a freshly polished watch can look dull again within days.
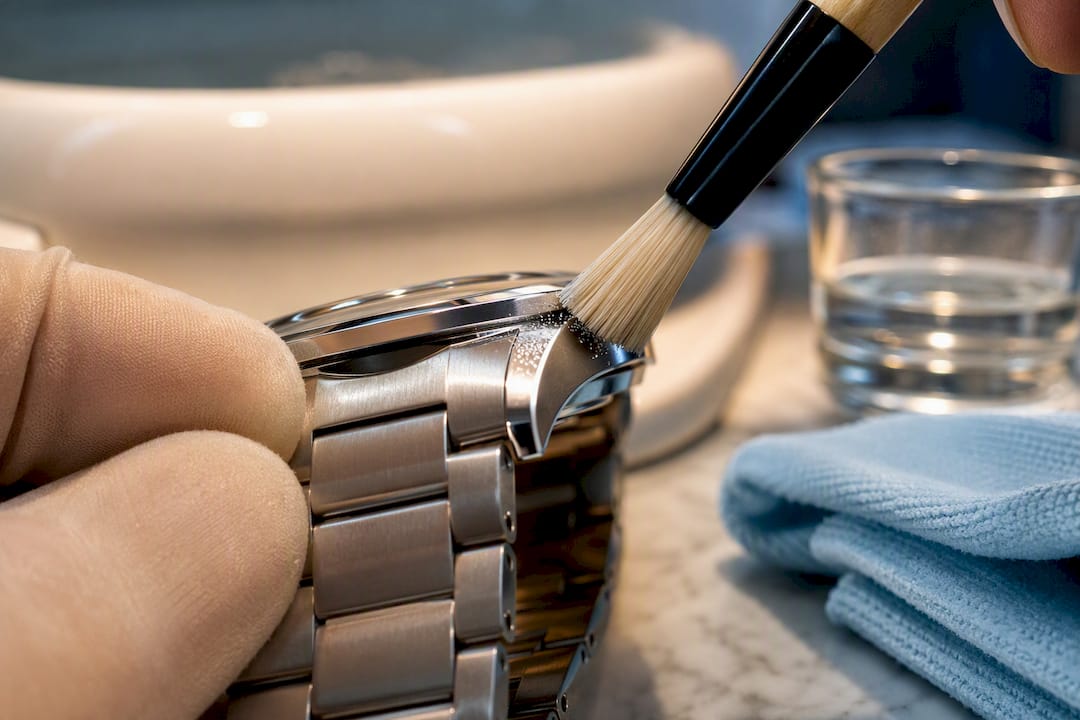
Wash the case with mild soap and warm water immediately after removing your masking tape, using a soft-bristled brush to work residue out of tight spots like lug holes and bracelet end links. Ultrasonic cleaners can help with stubborn compound buildup, but use them cautiously. Certain gaskets and older seals don’t tolerate ultrasonic vibration well, so check your watch’s water resistance rating and construction before running a full cycle. Dry the case thoroughly with a lint-free cloth, then let it air dry fully before reattaching the bracelet, since trapped moisture in crevices can lead to spotting later.
Everyday habits after that first restoration determine how soon you’ll need to repeat the process:
- Wipe the case down with a microfiber cloth after wear to clear skin oils and dust before they settle into the polish.
- Store the watch in a soft pouch or lined case rather than tossed in a drawer with other objects that can introduce fresh scratches.
- Avoid setting the watch face down on hard surfaces like countertops or desks, a habit responsible for more surface scratching than almost any other single behavior.
- Rinse off saltwater or chlorine exposure promptly, since both accelerate surface dulling on stainless steel over time.
A regular cleaning routine between full polish sessions extends how long the shine lasts and reduces how often you need to bring out the abrasives at all. Most owners find a light touch-up, a quick pass with polishing cream and a soft cloth, keeps the case looking fresh for months, while a full abrasive progression is only necessary once or twice a year even with regular wear.
Author Expertise and the Limits of DIY Restoration
This guide reflects practical, watchmaker-informed techniques rather than theoretical advice, and it comes from Raymond Jenkins, whose editorial work at ChronoCare focuses on translating professional watch care methods into steps a careful owner can actually follow at home.
ChronoCare’s product focus, cleaning kits, polishing creams, and restoration sponges formulated specifically for luxury timepieces, exists because most commercial polish products are built for general metal surfaces, not the tight tolerances and finish variety found across modern watch cases. That distinction matters when you’re working within a millimeter of a chamfer you can’t get back.
Home restoration has real limits, and knowing where they sit protects both your watch and your wallet. Deep gouges, coated surfaces, and collector-grade pieces belong with professionals who have calibrated equipment and case-specific experience most home setups can’t replicate. For the shallow, cosmetic scratching that makes up the bulk of everyday wear, though, a careful, patient approach with the right tools produces results that hold up under real scrutiny.
What Most DIY Guides Get Wrong About Polishing
Most advice on this topic treats polishing as a single skill, sand it, buff it, done, when it’s actually two entirely different disciplines depending on whether you’re working a mirror surface or a brushed one. Conflating the two is where most home jobs go sideways: readers apply mirror-polish circular motion to a brushed case and end up with a texture that matches nothing on the watch.
The bigger blind spot, though, is how little attention conventional guides pay to restraint. Everyone focuses on how to remove a scratch and almost nobody focuses on when to stop. A chamfer doesn’t announce that it’s about to round over. It happens gradually, one pass at a time, until the geometry that made the case interesting is just gone. That’s not a skill problem. It’s a discipline problem, and it’s the single biggest gap between amateur results and work that looks factory fresh.
If you take one thing from this guide, prioritize masking before technique. Good tape work forgives imperfect polishing. Perfect polishing technique cannot forgive a missing piece of tape.
— Raymond Jenkins
Choosing the Right ChronoCare Kit for Your Repair
Matching the right product to the step you’re actually on saves you money and prevents the temptation to grab whatever’s on hand, which is how cross-contamination and uneven results happen in the first place.
For the preparation and aftercare steps covered above, cleaning oils and debris before you start, then clearing residue once you’re finished, the Ultimate Watch Cleaning Kit handles both ends of the process without introducing anything abrasive to a surface you’re not ready to work on yet. When you’re moving through a full abrasive progression on a mirror-polished case, the Ultimate Watch Polishing & Cleaning Kit bundles the compounds and cleaning steps into one sequence built specifically around the case geometries discussed here, rather than a general-purpose metal polish that wasn’t designed with chamfers in mind. For lighter maintenance between full sessions, the kind of quick touch-up that keeps you from needing a full sanding progression every few months, the Watch Polishing Cream restores shine to light surface scratches without the multi-stage grit work a deeper repair demands.
If your watch has coating, engraving, gem settings, or scratches deep enough to catch a fingernail, stop here and consult a professional restorer instead of reaching for any kit. For everything else, browse the full ChronoCare lineup and start with whichever kit matches the stage you’re actually working on.
Sources
The techniques in this guide draw on established watchmaking practice rather than shortcuts, and a few sources are worth reading directly if you want more detail on any single step.
If a scratch or damage you’re looking at falls outside anything described here, particularly on a coated, engraved, or collector-grade piece, a professional restorer with case-specific tooling remains the safer route regardless of how confident you feel with the techniques above.