

Blend Scratches, Preserve Value: A Collector's Watch Polishing Guide
Home polishing is safe for light surface scratches and everyday upkeep, but only if you treat it as scratch blending rather than metal removal. The rule that governs everything else: soften the visibility of fine marks and leave the case edges alone. If the watch is vintage, gold-plated, PVD or DLC coated, or carries a scratch deep enough to catch a fingernail, stop and call a watchmaker instead.
TL;DR:
- Home polishing is safe only for surface scratches on stainless steel watches and requires avoiding deep or multiple marks that require material removal.
- Use the fingernail test to determine if scratches are light and surface-level, and avoid polishing plated, coated, vintage, or heavily scratched watches.
- Proper technique involves blending scratches with polishing cloths and compounds, working carefully over edges without rounding sharp case chamfers.
- Essential tools include Cape Cod cloths, masking tape, microfiber cloths, and specific compounds; avoid power tools to prevent heat damage and material loss.
- Professional polishing is recommended for deep scratches, vintage pieces, or coated surfaces, with costs typically ranging from $100 to $300, depending on work complexity.
Table of Contents
- Should You Polish Your Watch Yourself?
- How Do You Identify Watch Materials and Finishes Before Polishing?
- What Tools and Materials Do You Need for Home Polishing?
- Preparing the Watch and Workspace Before You Polish
- Step-by-Step: Blending Micro-Scratches on the Case
- Polishing the Bracelet and Clasp
- How Do You Polish or Restore a Scratched Watch Crystal?
- Restoring a Brushed Finish Without Ruining the Transition
- Final Cleaning and How Often You Should Polish
- Common Mistakes and How to Fix Them
- When Should You Hire a Professional Instead?
- Expert Tips for Getting Better Results
- A Collector’s Case for Restraint
- Get the Right Products for Every Step of This Process
- Sources
Should You Polish Your Watch Yourself?
Run the fingernail test before you touch any cloth or compound. Drag a nail lightly across the scratch. If your nail glides over it, that’s a surface mark you can likely blend out at home. If the nail catches or dips into a groove, you’re looking at a scratch that’s cut into the metal deep enough that home polishing will either fail to fix it or make the surrounding finish look worse trying.
Material and finish matter just as much as scratch depth. A few situations should send you straight to a professional rather than your workbench:
- Gold-plated or gold-filled cases. The plating layer is often just microns thick. Any abrasive contact risks polishing straight through to base metal.
- PVD or DLC coatings. These black or colored coatings sit on the surface rather than being solid metal. Polishing compounds strip them, and there’s no home fix once that happens.
- Vintage pieces, especially anything with collector or resale value. Original finish and sharp case edges are a meaningful part of what a vintage watch is worth. Softened edges from over-polishing are not reversible.
- Deep or multiple crossing scratches. These usually mean the case has years of wear that a polishing cloth won’t undo without removing more material than you want to lose.
The scratch-blending philosophy exists precisely because most home attempts fail not from lack of effort, but from trying to erase a mark completely instead of just making it less visible. A watch with a dozen hairline marks blended into a soft, even finish looks better and holds more value than one with a single scratch “fixed” by grinding down a whole section of case.
If your watch passes the fingernail test and isn’t plated, coated, or a collectible vintage piece, you’re in reasonable territory to proceed carefully.
How Do You Identify Watch Materials and Finishes Before Polishing?
Tilt the case under a single directional light source, like a desk lamp, and rotate it slowly. A brushed (satin) finish scatters light unevenly and shows fine parallel lines running one direction. A polished finish reflects light in a clean, mirror-like band that moves smoothly as you rotate the case. Most modern watches combine both: polished bevels and links next to brushed centers and lugs. Mixing up which is which, and treating a brushed surface with a polishing compound, is the single most common way home polishing goes wrong.
Material behavior varies enough that a technique safe on one case can ruin another:
- Stainless steel is the most forgiving material for home polishing. It’s hard, resists heat buildup, and tolerates cutting and finishing compounds reasonably well when used sparingly.
- Solid gold polishes similarly to steel but removes faster since it’s softer. Go lighter on pressure and time than you would with steel.
- Gold-plated or gold-filled cases should generally be left to a professional. The plating is thin, and there’s no way to “test” how much margin you have before wearing through it.
- Titanium has a naturally matte, low-reflectivity surface and is more prone to visible heat discoloration if you work too aggressively in one spot. It also scratches into a slightly different gray tone than steel, which can throw off color matching if you’re not careful.
- PVD and DLC coatings are essentially off-limits for abrasive polishing. These are thin-film coatings, not solid metal, and standard case-polishing methods remove them rather than restore them.
- Ceramic is extremely hard and brittle. It resists everyday scratching well, but chipping is a real risk if you use aggressive abrasives near edges.
- Acrylic (plexi) crystals are soft plastic and respond well to specific crystal polish. Sapphire and mineral glass crystals are a different story entirely, and that distinction matters enough that it gets its own section below.
The difference between polished and brushed technique isn’t a minor detail. Polished surfaces call for polishing cloths and compounds; brushed surfaces need a unidirectional abrasive pad. Cross them and you’ll either dull a mirror finish or turn a satin surface into an uneven, patchy mess.
What Tools and Materials Do You Need for Home Polishing?
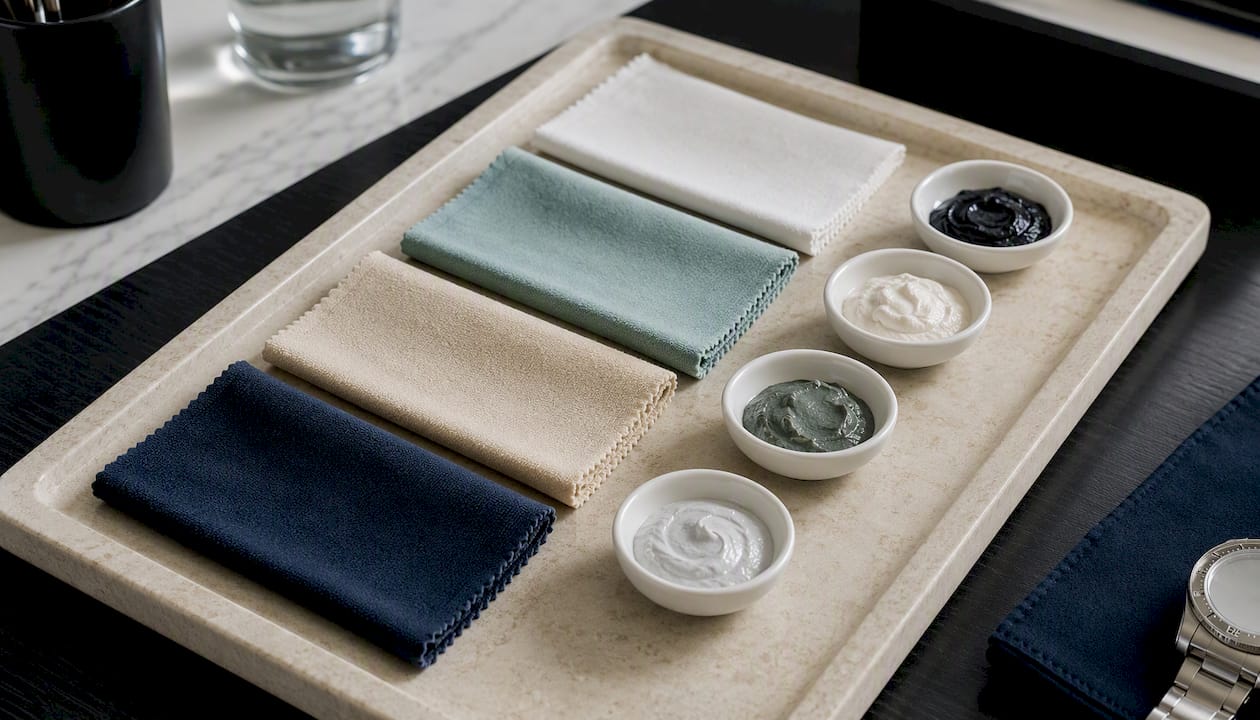
You don’t need a jeweler’s bench, but you do need the right handful of items, and skipping the cheap ones (tape, microfiber) is where most damage happens. Here’s what belongs in a home polishing kit:
- Cape Cod polishing cloths for restoring shine on polished metal surfaces. These combine a mild chemical treatment with very fine abrasive particles, giving you gentle, controlled correction without the aggressiveness of a loose compound.
- A cutting compound and a separate finishing compound, used only if a polishing cloth alone doesn’t blend the scratch. Cutting compound levels the surface slightly; finishing compound brings back the mirror shine afterward.
- An ultra-fine grey Scotch-Brite pad for brushed finishes. This is the correct abrasive for restoring directional grain, and it should never touch a polished surface.
- PolyWatch for acrylic crystals only. It has no place near sapphire, mineral glass, or metal.
- Painter’s tape or specialty watch masking tape, plus microfiber cloths and Rodico (a tacky putty used by watchmakers to lift dust and fine debris without scratching anything).
- Isopropyl alcohol or a mild soap-and-water solution for cleaning between stages.
Skip motorized buffers, rotary tools, and anything resembling a Dremel. Watchmakers avoid handing these to inexperienced users for good reason: motorized tools remove metal fast, build heat that can compromise gaskets, and are nearly impossible to control precisely around a crown or pusher. A hand cloth might take you ten extra minutes. A rotary tool can take off a case edge in two seconds, permanently.
Pro Tip: Keep a separate, labeled cloth for each compound and each stage. A cloth that’s touched cutting compound will contaminate a finishing stage if you reuse it, leaving faint scratch trails in what should be a mirror surface.
Preparing the Watch and Workspace Before You Polish
Preparation determines whether the actual polishing goes smoothly or turns into damage control. Work through these steps in order:
- Check the water resistance rating before wetting anything. A watch with unknown or compromised gaskets should only get a dry or barely-damp microfiber wipe, never submersion or heavy soap and water.
- Clean the case and bracelet first. A damp microfiber cloth handles daily grime; a soft brush with mild soap works for accumulated dirt in the lugs and clasp, provided the water resistance supports it. This step matters because trapped grit acts like sandpaper once you start polishing over it, as general jewelry-cleaning guidance also emphasizes.
- Remove the bracelet or strap. Polishing a case that’s still attached to its bracelet means constantly working around metal links, risking scuffed clasps and awkward angles that lead to uneven pressure.
- Mask sensitive areas with fresh tape. Cover the crown, pushers, case back edge, and any gasket-adjacent seams. Reused or curling tape edges let compound seep underneath, so cut fresh strips and press them down firmly.
- Mask the case edges themselves, leaving a narrow buffer. This is the step most home polishers skip, and it’s arguably the most important habit for preserving factory chamfers, since a cloth that wraps over a sharp corner will round it off within seconds.
Take a few macro photos of the case before you start. It sounds unnecessary until you’re deep into polishing and can’t remember whether a mark was there originally or if you just made it worse.
Step-by-Step: Blending Micro-Scratches on the Case
Start with the mildest option and only escalate if it genuinely isn’t enough. Jumping straight to cutting compound on a scratch that a microfiber cloth could have handled is how minor marks turn into bigger polishing jobs.
- Wipe the target area with a clean microfiber cloth first. Sometimes what looks like a scratch is actually surface residue or a light film, and it disappears with nothing more than friction and a dry cloth.
- Move to a Cape Cod polishing cloth if the mark persists. Work in short, straight strokes following the original brushed or polished direction of that section, applying light, even pressure. Check your progress every 15 to 20 strokes by tilting the case under your light source.
- If the scratch is still visible after several passes, introduce a cutting compound. Apply a small amount to a dedicated cloth, work it over the scratch in the same directional strokes, and stop as soon as the depth reduces. You’re blending, not erasing.
- Clean the area completely before moving to finishing compound. Wipe away every trace of cutting compound with a fresh microfiber cloth and, if the watch’s water resistance allows, a quick alcohol wipe. This is not optional. Cross-contamination between cutting and finishing stages is one of the most reliable ways to end up with a hazy, uneven result instead of a clean mirror finish.
- Apply finishing compound with a separate clean cloth. Use lighter pressure than you did with the cutting stage. This step restores the reflective shine and smooths out any fine marks the cutting compound left behind.
- Keep a wide buffer near every edge and corner throughout. Lift the cloth or ease off pressure as you approach a chamfer or bevel line. This is the number one place amateur polishing jobs go wrong, and it’s also the hardest thing to undo.
- Inspect under directional light after every few passes, not just at the end. Rotate the case slowly and look for uneven brightness, which usually signals you’ve worked one spot more than its neighbors.
- Stop the moment the scratch has blended into the surrounding finish. You’re not chasing invisibility. You’re chasing “you’d have to know it was there to find it.”
Professional watchmakers who do this for a living understand that a scratch reduced by 80 percent and left alone looks better in five years than one “fully removed” at the cost of a softened edge. Case geometry, once altered, doesn’t come back. That’s the entire logic behind treating this as scratch blending rather than scratch removal, and it’s worth repeating to yourself every time you’re tempted to keep going for one more pass.
Photograph the case again once you’re satisfied. Comparing before and after shots is the easiest way to confirm you actually improved the finish rather than just moved the shine around.
Polishing the Bracelet and Clasp
Bracelet polishing is more repetitive than case work, but it rewards patience over speed. Rushing across multiple links is how you end up with an uneven finish that looks worse under bright light than a single untouched scratch would have.
- Clean the bracelet separately before you polish it. An ultrasonic cleaner works well here if you have access to one, though a soft brush with mild soap and thorough drying is perfectly adequate for most home setups.
- Polish one link at a time on mirrored sections. Use a Cape Cod cloth or fine polishing cloth with short, controlled strokes, checking each link individually before moving to the next. Trying to polish several links in one sweeping motion is a fast way to apply uneven pressure across the chain.
- Restore brushed center links with an ultra-fine grey Scotch-Brite pad, following the grain direction exactly. Brushed and polished sections need entirely different tools, and running a polishing cloth over a satin link by mistake will convert that section into an accidental mirror finish that’s genuinely difficult to reverse without proper re-brushing equipment.
- Polish the clasp last, since it usually shows the most wear. Pay attention to the folding mechanism and any engraved logos, working around them rather than over them to avoid softening detail.
- Check for uniform appearance by laying the bracelet flat under your light source. Every link should reflect or scatter light the same way as its neighbors. A link that stands out as noticeably shinier or duller means it needs another light pass, or that you overdid it on the previous one.
Routine care for polished metal links can lean on the same gentle chemical-plus-abrasion approach that Cape Cod cloths use, which is mild enough for monthly touch-ups without stripping material the way a full cutting compound treatment would.
How Do You Polish or Restore a Scratched Watch Crystal?
Crystal material determines everything here, and there’s no gray area worth experimenting in.
Acrylic (plexi) crystals respond well to PolyWatch, a purpose-built polish that’s become something of an industry standard for this exact job. Apply a small dab, roughly pea-sized, directly onto the scratched area. Rub it in small circular motions with light to moderate pressure using a soft cloth or your fingertip, working for 30 to 60 seconds. Wipe away the residue with a clean cloth and inspect under light. Repeat two or three times for deeper scratches, letting the crystal cool between passes if it feels warm from friction. PolyWatch is specifically formulated for acrylic and should never be used on sapphire or coated crystals.
Sapphire crystals, despite being scratch-resistant in daily wear, are essentially not polishable at home once they do scratch. Sapphire’s hardness, which is what makes it so scratch-resistant to begin with, is exactly why home polishing compounds can’t touch it. Attempting to polish sapphire with tools designed for acrylic accomplishes nothing beyond wasted effort.
Mineral glass crystals fall somewhere in between. They’re softer than sapphire but not designed to be buffed out at home the way acrylic is, and results are inconsistent at best.
- If you’re dealing with a scratched sapphire or mineral glass crystal, professional crystal replacement is the correct and often more cost-effective path.
- If the crystal is acrylic and PolyWatch hasn’t fully cleared a deep scratch after a few attempts, that’s your signal to stop rather than keep grinding at the same spot.
- Never apply metal polishing compounds to any crystal type. They’re formulated for a completely different material hardness and will haze plastic or glass rather than clarify it.
Restoring a Brushed Finish Without Ruining the Transition
Re-creating a brushed finish is less forgiving than case polishing because there’s no fallback if you go cross-grain. A mismatched brush pattern is immediately visible under any light, even to someone who doesn’t know watches.
Identify the grain direction first by studying an unscratched section of the same surface, or a matching section elsewhere on the case. Most brushed surfaces run either lengthwise along the lugs or in a single consistent direction across a flat top. Match that direction exactly.
- Use an ultra-fine grey Scotch-Brite pad, cut into a small workable piece, for the actual re-brushing.
- Apply light, even pressure in single-direction strokes only. Never work back and forth like you’re scrubbing. Lift the pad, reset, and pull through again in the same direction each time.
- Mask the boundary where brushed meets polished with a clean, straight tape edge, since the two finishes typically meet at a sharp line that’s easy to blur if you drift.
- Test on a small, inconspicuous section first, like the underside of a lug, before committing to a visible surface.
Pro Tip: Trim your masking tape with a fresh blade edge rather than tearing it. A straight, clean tape line gives you a crisp boundary between brushed and polished sections, while a torn edge leaves gaps that let your abrasive pad wander into territory it shouldn’t touch.
Final Cleaning and How Often You Should Polish
Once you’re satisfied with the result, the job isn’t done until every trace of compound is gone. Wipe the entire case and bracelet down with a clean microfiber cloth, then inspect closely under your light source, paying particular attention to gasket seams, crown threads, and lug notches where residue likes to hide. Compound trapped near a gasket can degrade the seal over time, so don’t rush this step.
- Wipe thoroughly, then re-inspect after 10 minutes. Residue sometimes becomes visible again as it settles into recesses.
- Aim for once or twice a year on an everyday watch you wear regularly, not more.
- High-value vintage pieces should be polished far less often, if at all, since preserving original finish typically matters more to long-term value than removing every visible mark.
- Wipe your watch down after heavy sweat exposure or salt water contact, since these accelerate the fine scratching that eventually calls for polishing in the first place.
- Store the watch in a soft pouch or lined case rather than tossing it in a drawer with other objects that can mark the case.
A little routine wiping does more to delay your next polishing session than any product on the shelf.
Common Mistakes and How to Fix Them
Most home polishing damage traces back to a handful of repeat offenses, and nearly all of them are avoidable with slower, more deliberate technique.
- Over-polishing edges. This happens when you focus so intently on the scratch itself that the cloth drifts onto the adjacent chamfer without you noticing. Fix: work in shorter bursts and check edge sharpness under light every few strokes, not just at the end.
- Mixing compounds on the same cloth. A cloth that’s carried cutting compound will leave faint trail marks if reused during the finishing stage. Fix: label cloths clearly and never let them cross stages, even once.
- Accidentally polishing a brushed surface into a mirror finish. This is one of the few mistakes with limited home remedy. Reversing it typically requires proper re-brushing equipment and skill that goes beyond a Scotch-Brite pad and patience. Prevention, meaning masking and double-checking finish type before you start, is far more reliable than any fix.
- Skipping the cleaning step between cutting and finishing compound. This produces a hazy, streaky result instead of a clean mirror shine. Fix: always clean and dry the surface fully before switching compounds, even if it feels like an unnecessary pause.
- Using too much pressure too soon. Heavy-handed technique on the first pass removes more material than intended before you’ve even assessed how the surface responds. Fix: start light, always.
When Should You Hire a Professional Instead?
Certain thresholds should end your DIY attempt before you start, not after you’ve made things worse. The fingernail test remains your clearest signal: if a scratch catches your nail, home tools won’t blend it without removing more metal than is wise. Vintage and collectible watches deserve the same caution regardless of scratch depth, since original case geometry is part of what collectors are paying for.
Budget-wise, professional light polishing typically runs somewhere in the $100 to $300 range, depending on brand, case complexity, and the extent of the work. A full refinish involving deeper scratches, edge restoration, or bracelet stretch repair usually costs more, and pricing varies enough by shop that it’s worth getting a quote before committing.
When choosing a watchmaker for refinishing work:
- Ask to see before-and-after photos of past polishing jobs, ideally on a similar brand or case style to yours.
- Confirm they carry insurance for the watch while it’s in their possession.
- Check for professional credentials or trade affiliation. The American Watchmakers-Clockmakers Institute maintains standards for the trade and is a reasonable starting point for vetting.
- Ask specifically how they handle case edges and chamfers, since a shop that treats every scratch the same way probably isn’t practicing scratch blending either.
Expert Tips for Getting Better Results
A few habits separate a clean home polishing job from a mediocre one, and none of them cost extra money.
Cut your masking tape rather than tearing it, work one compound stage per cloth with zero exceptions, and photograph the watch before and after every session. These three habits alone prevent most of the damage that sends people looking for professional repair.
Preserving a watch’s value has less to do with the products you use and more to do with restraint. The best home polishing jobs are the ones where you stopped a few strokes earlier than you wanted to.
Raymond Jenkins draws on years of writing about watch care and restoration technique, focusing on practical, safety-first methods that individual collectors can execute without specialized equipment. When using ChronoCare’s polishing cream, apply it sparingly and buff with a fresh microfiber cloth. Thin, even layers outperform heavy application every time.
A Collector’s Case for Restraint
Every scratch tells you something about how a watch was worn, and I’ve come to think most collectors are too quick to erase that history entirely. The instinct to make a case look “new again” is understandable, but it works against you the moment you start rounding edges to chase a scratch that was never going to hurt the watch’s value in the first place.
Blending beats removal almost every time, not because it’s the safer choice, but because it’s usually the better-looking one too. A watch with softened, even wear reads as cared for. A watch with one suspiciously perfect corner next to three worn ones reads as tampered with, and that’s the outcome that actually hurts resale.
My rule stays simple: if I’m not confident the mark will disappear in three or four light passes, I’m calling a watchmaker instead of reaching for cutting compound.
— Raymond Jenkins
Get the Right Products for Every Step of This Process
Following this guide gets you most of the way there, but the products you use for each stage matter as much as the technique. ChronoCare builds its lineup around exactly the workflow described above: preparation, correction, and finishing, without pushing you toward aggressive removal that trades short-term shine for long-term case wear.
Start with the Ultimate Watch Cleaning Kit for the preparation stage covered earlier, removing grime and residue before any polishing begins. For the actual scratch-blending work on case and bracelet, the Ultimate Watch Polishing & Cleaning Kit pairs cleaning and polishing formulas designed to work together through both stages without the cross-contamination risk of mixing separate products. If you only need a finishing-stage product for light touch-ups between full polishing sessions, the Watch Polishing Cream is formulated specifically to restore shine on metal surfaces without stripping more material than necessary. Every ChronoCare formula is built around the same preservation-first principle this guide follows: correct the surface, protect the edges, and give you a straightforward next step whenever you’re ready to start.
Sources
This guide draws on established watch-care methodology from Buzzufy’s case polishing walkthrough, DrWatch’s bracelet polishing guide, Hewore’s mistake-avoidance guide, and Mister Chrono’s PolyWatch and Cape Cod reference. For professional standards, see the American Watchmakers-Clockmakers Institute. For deeper reading on cleaning and post-service care, ChronoCare’s guides on polishing after service and safe collector cleaning routines cover related ground in more depth.
- Watch Case Polishing At Home: A Step-By-Step Guide
- How to Polish a Stainless Steel Watch Bracelet at Home | DrWatch Blog
- How to Polish a Watch — Avoid Costly Mistakes - Hewore
- Misterchrono
- American Watchmakers-Clockmakers Institute (AWCI)