

Collectors: Remove Hairline Bracelet Scratches Without Over Polishing
Yes, most hairline scratches on a metal watch bracelet can be blended out at home. Clean the bracelet first, use a Cape Cod polishing cloth on polished links, or an ultra-fine grey Scotch-Brite pad on brushed finishes, working with the grain. Skip the coarse abrasives, skip circular motions, and don’t polish plated or coated pieces. If a scratch catches your fingernail, send it to a professional instead of pushing further.
TL;DR:
- Hairline scratches on polished bracelet links can be minimized at home using a Cape Cod cloth with controlled, one-direction rubbing and short, consistent passes.
- Brushed or satin finishes require matching the grain direction and using a fine Scotch-Brite pad, with masking to protect adjacent areas, to prevent cross-hatch marks.
- Deep scratches that catch a fingernail or on precious metals like gold and platinum should only be handled by professionals to avoid irreversible damage.
- Proper preparation involves thorough inspection, masking, and working on a clean, padded surface to avoid worsening existing scratches or creating new ones.
- Regular cleaning may resolve dull appearance issues without abrasives, but polishing should be reserved for genuine surface marks or stubborn spots, and limited to occasional use.
Table of Contents
- What Tools Do You Need to Remove Hairline Bracelet Scratches?
- How Should You Prepare the Bracelet Before Polishing?
- How Do You Polish Out Scratches on Polished Bracelet Links?
- How Do You Remove Scratches From a Brushed or Satin Bracelet?
- Should You Clean the Bracelet Instead of Polishing It?
- When Should You Take the Bracelet to a Professional Instead?
- What Does a Safe, ChronoCare-Backed Polishing Workflow Look Like?
- Should You Polish Out Every Scratch, or Leave Some Alone?
- Get the Right Tools for Safe, Controlled Polishing
- Where Can You Verify Model-Specific Polishing Guidance?
- Sources
- FAQ
What Tools Do You Need to Remove Hairline Bracelet Scratches?
You don’t need a jeweler’s bench. You need a handful of specific items, and using the wrong substitute (a paper towel, a kitchen sponge, car polish) is how a hairline scratch turns into a bigger problem.
- Cape Cod polishing cloth: an impregnated cloth with fine abrasive and polish already worked into the fabric, designed to gently cut down mirror-polished metal without leaving swirl marks.
- Ultra-fine (grey) Scotch-Brite pad or finishing pad: for brushed and satin finishes, since a Cape Cod cloth will make matte metal look glassy in the wrong spot.
- Microfiber cloths: at least two, one for buffing residue and one kept clean for final inspection.
- Masking tape: low-tack painter’s tape works fine to protect the case, crystal, and any polished sections next to the area you’re working on.
- Spring-bar tool (or a similar bracelet removal tool), a soft-bristle brush, mild dish soap, and a jeweler’s loupe or a strong magnifier.
If you’d rather not improvise with separate tools, a polishing cream or the full Ultimate Watch Polishing & Cleaning Kit bundles the cream, pads, and cloths into one controlled workflow.
How Should You Prepare the Bracelet Before Polishing?
Rushing prep is the number one reason DIY polishing jobs go wrong. Take five extra minutes here.
- Inspect under strong, raking light. Angle a lamp across the bracelet rather than straight down. Hairline scratches show up clearly at a low angle and almost disappear under flat overhead light.
- Run the fingernail test. Drag a fingernail gently across the mark. If your nail catches or snags, it’s deeper than surface level, and no cloth or pad will fully erase it.
- Remove the bracelet, or at minimum unclasp it, using a spring-bar tool. Working on a flat link away from the case removes the risk of slipping and scratching the crystal or dial.
- Mask everything you’re not treating. Tape off the case back, lugs, and any polished center links if you’re about to work a brushed outer link, and vice versa.
- Work on a clean, padded surface under consistent lighting, and keep abrasive residue away from spring bars, pinholes, and clasp mechanisms where grit can cause long-term wear.
How Do You Polish Out Scratches on Polished Bracelet Links?
Mirror-polished center links show hairline scratches the worst because there’s no grain to hide them. The fix is controlled, one-direction work, not scrubbing.
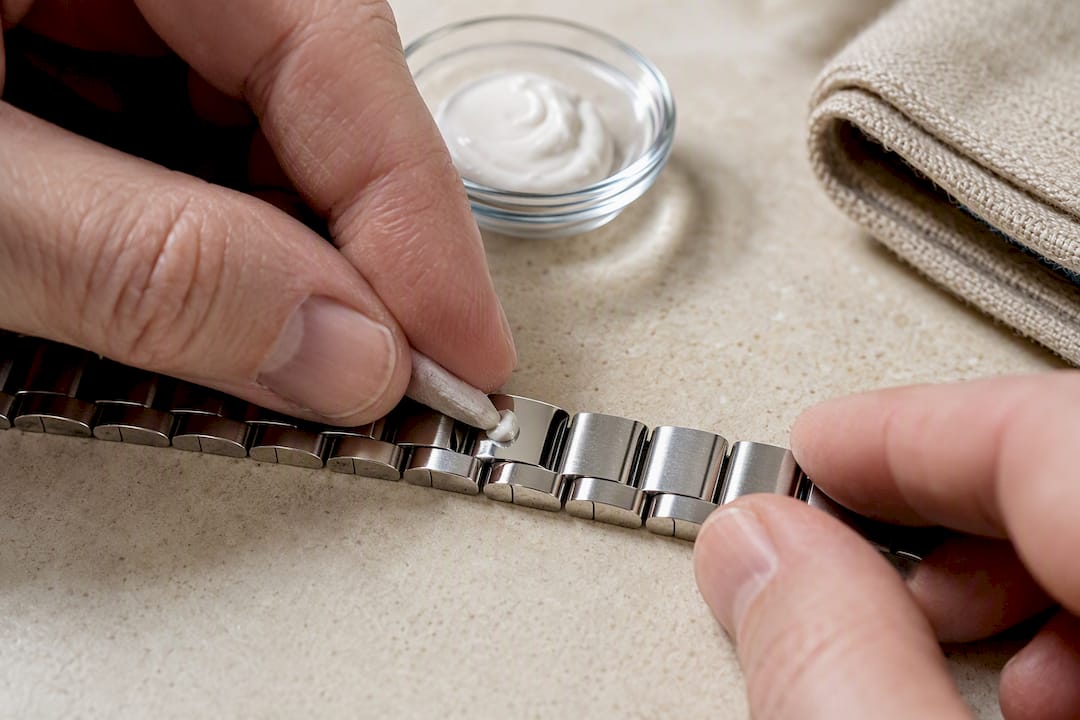
Fold a section of the Cape Cod cloth so you have a firm, flat working edge, then rub the scratched area in a single direction, following the existing polish lines rather than the length of the bracelet. Use light to moderate pressure, similar to what you’d use erasing a pencil mark, and work in short passes of 30 to 60 seconds per link before checking your progress.
- Stop and inspect every 30 seconds under the same raking light you used during prep.
- Watch for a bright, glassy patch forming next to a duller area. That’s a sign you’re over-polishing one spot instead of blending the whole surface.
- Wipe the link clean with a dry microfiber cloth between passes so you’re not just moving abrasive residue around and masking your own progress.
- Do a final wash with mild soap and water to clear any cloth residue, then buff dry.
This same one-direction, low-pressure logic is why detailing guides recommend single-direction correction rather than circular buffing when removing swirl marks from any polished surface. Metal and clear coat behave differently, but the physics of hiding a scratch by blending the surrounding area is the same.
Pro Tip: Stop as soon as the scratch blends into the surrounding finish under normal room light. Chasing a perfect, zero-scratch mirror finish is what rounds off sharp factory edges over repeated sessions.
For a small, isolated scratch, a polishing cream gives you finer control than a dry cloth alone since you can apply it to just the affected link.
How Do You Remove Scratches From a Brushed or Satin Bracelet?
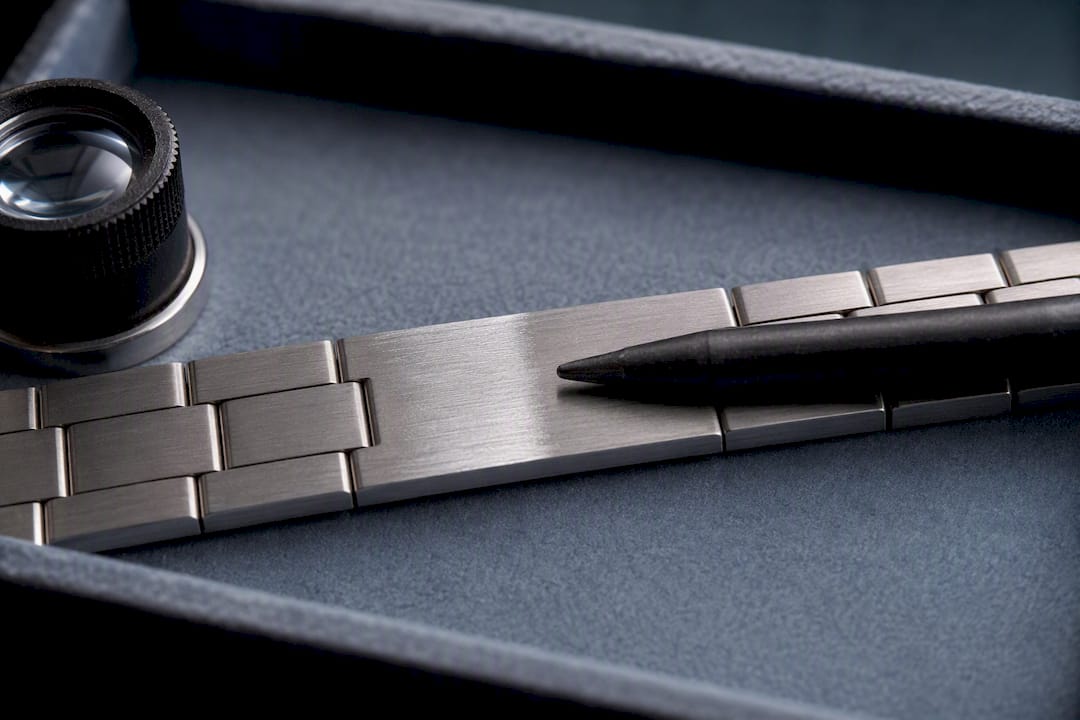
Brushed finishes are less forgiving than polished ones. Go against the grain, even briefly, and you’ll create a visible cross-hatch that stands out more than the original scratch did.
- Identify the grain direction first. Tilt the link under light and look for the fine parallel lines running across the metal. Almost all brushed bracelet links run the grain lengthwise, but some models vary link by link.
- Mask any adjacent polished chamfers or edges, since a Scotch-Brite pad will dull a polished bevel almost instantly.
- Use the grey ultra-fine pad only, never a green or maroon pad, which cut too aggressively for watch metal.
- Apply light, straight passes parallel to the grain, five to ten strokes at a time, checking progress after each set. A DIY method built around masking the case, working with the grain, and using a grey non-woven pad is exactly how one detailed bracelet-polishing walkthrough describes the safe approach, and it lines up with what most experienced watchmakers do at the bench.
- Compare against an unscratched link in the same light before deciding you’re done. Brushed finishes vary slightly between watches, so match the bracelet’s own grain, not a photo online.
Restoring a satin finish properly really does require staying parallel to the original lines. Professionals often reach for fiberglass pens or Bergeon finishing blocks specifically because hand pressure with a pad is harder to keep consistent across an entire link.
Pro Tip: If two passes haven’t visibly reduced the scratch, stop. A third or fourth pass rarely helps and usually just widens the dull patch, at which point a fiberglass pen or a trip to a watchmaker is the smarter move.
Should You Clean the Bracelet Instead of Polishing It?
Cleaning solves more “scratched” complaints than people expect. A dull, hazy bracelet is often coated in skin oil, sunscreen, and soap residue, not actually damaged.
- Soak the bracelet briefly in warm water with a few drops of mild dish soap.
- Work a soft-bristle brush into the links and between the gaps, where grime tends to hide.
- Rinse thoroughly and dry completely with a microfiber cloth before deciding whether any scratch is still visible.
Most dull-looking bracelets are cleaner problems than scratch problems, and thorough cleaning frequently resolves the issue without any abrasive work at all. ChronoCare’s own link cleaning checklist covers this routine in more depth if you want a repeatable weekly habit.
Polishing is different: it physically removes a microscopic layer of metal every time, which is exactly why it should stay occasional, not routine. This distinction matters even more on plated, PVD-coated, or titanium pieces, where the surface finish is thinner and less forgiving than solid steel or gold, and where an abrasive pad can wear through a coating in a handful of passes.
When Should You Take the Bracelet to a Professional Instead?
Some scratches simply aren’t a home job, and pretending otherwise usually makes things worse.
- The fingernail catches. That’s your clearest signal the scratch has real depth and needs machine polishing or link replacement rather than a cloth.
- The bracelet is gold, platinum, or heavily plated. Tiffany & Co. specifically advises that gold and platinum polishing be done by a professional, since polishing removes metal and DIY attempts on precious metals are hard to reverse.
- You’ve already polished it once or twice this year. Cartier’s own guidance cautions against frequent polishing of precious metal pieces because repeated sessions gradually change the piece’s edges and proportions.
Professional polishing typically runs $100 to $300 depending on the metal and bracelet complexity, against maybe $15 to $30 in DIY supplies. That gap buys you controlled machine polishing wheels and a trained eye, both of which catch problems a home kit can’t. If the damage looks past hairline territory, ChronoCare’s guide on removing deeper case scratches walks through how to tell the two apart.
What Does a Safe, ChronoCare-Backed Polishing Workflow Look Like?
The sequence matters as much as the tools. Skipping steps, or doing them out of order, is how a five-minute touch-up turns into an hour of damage control.
- Clean first, always. Removing grime before polishing means you’re not grinding dirt into the metal surface.
- Check the grain on every link before touching it, since polished and brushed sections often sit right next to each other on the same bracelet.
- Spot-polish only the affected link, not the whole bracelet, to keep wear even and avoid mismatched shine.
- Finish with a dry microfiber buff and a final inspection under the same light you started with.
A Cape Cod cloth is great for quick touch-ups, but a cream like a polishing cream gives finer control on stubborn spots because you control exactly how much product and pressure goes into one area. Reaching for automotive metal polish or a kitchen abrasive instead is a common shortcut, and it’s usually the wrong one: those compounds are formulated for different metals and often cut far more aggressively than a watch bracelet needs. For a deeper reference on preserving factory finish while polishing, ChronoCare’s collector’s polishing guide covers the same principles in more detail.
Should You Polish Out Every Scratch, or Leave Some Alone?
Not every scratch deserves to be erased. A bracelet that’s been worn for a decade tells that story through its surface, and collectors often value that over a factory-fresh mirror finish. Polishing every mark chases that patina away permanently, and doing it too often gradually softens edges and lowers resale value on collectible pieces. The practical middle ground for daily wear: blend the marks that genuinely bother you, leave the rest, and keep polishing sessions rare rather than routine.
— Raymond Jenkins
Get the Right Tools for Safe, Controlled Polishing
Improvising with automotive polish, kitchen scrubbers, or whatever cloth is nearby is how a hairline scratch turns into a bigger repair bill. ChronoCare’s Ultimate Watch Polishing & Cleaning Kit pairs a Cape Cod style cloth, an ultra-fine finishing pad, and a proper polishing cream in one set, formulated specifically for luxury watch metal instead of borrowed from a garage shelf.
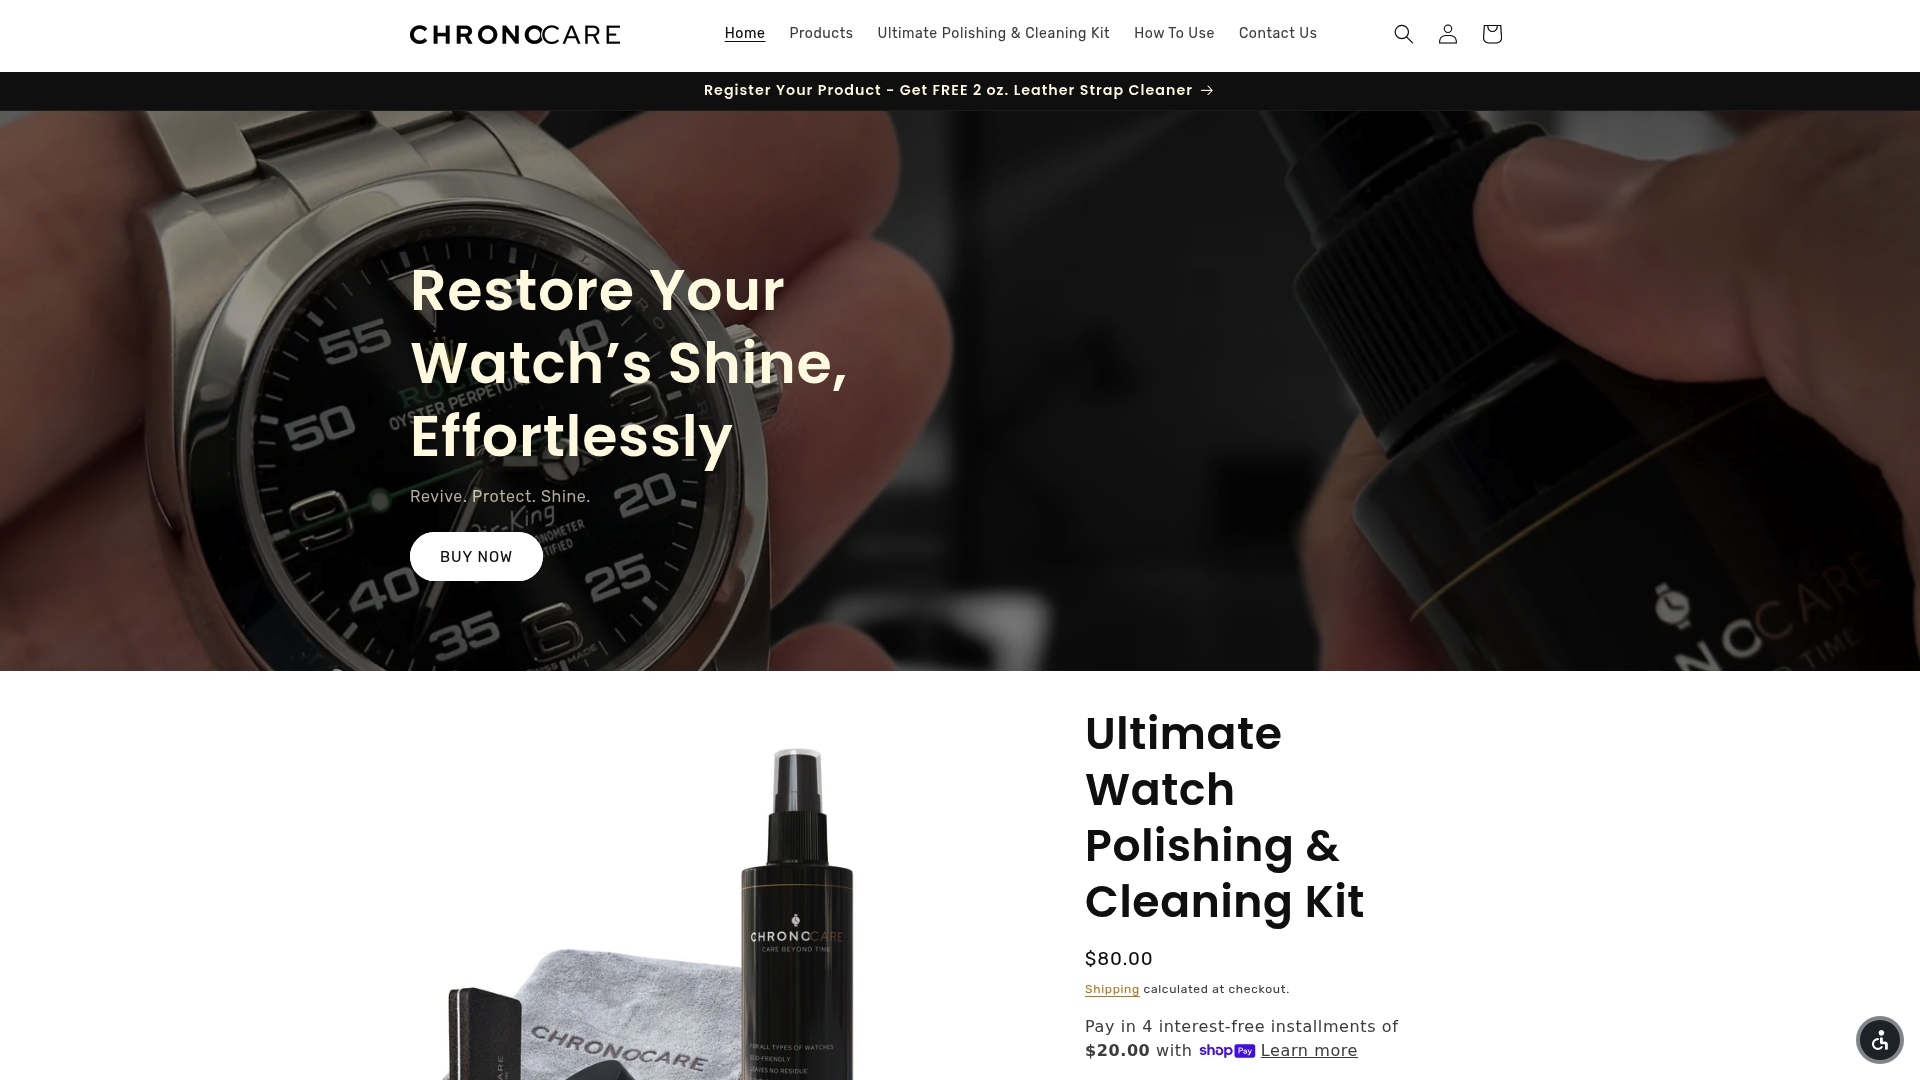
The kit covers exactly the sequence walked through here: clean, check the grain, spot-polish, buff. It’s built for collectors who want to handle routine touch-ups themselves without guessing at product compatibility, and it costs a fraction of a single professional polishing visit. If your scratch passes the fingernail test and sits on a polished or brushed steel bracelet, this is the lower-risk starting point before booking a watchmaker. Check current availability on the Ultimate Watch Polishing & Cleaning Kit page and get the sequence right the first time.
Where Can You Verify Model-Specific Polishing Guidance?
Every manufacturer treats polishing frequency and precious-metal care a little differently, so it’s worth checking the source before working on a specific piece.
- Cartier’s jewelry care guidance outlines why precious-metal polishing should stay infrequent.
- Tiffany & Co.'s care and repair FAQ covers professional-only polishing for gold and platinum pieces.
- Rolex’s official site lists authorized service center options for anyone unsure whether a piece qualifies for DIY work at all.
Authorized service centers carry the specific finishing wheels and compounds matched to a brand’s factory tolerances, something no home kit fully replicates.
Sources
- Jewellery Care & Polishing | FAQs & Help | Cartier®
- How to remove scratches from gold and platinum? | Tiffany & Co. US
- How to Polish a Stainless Steel Watch Bracelet at Home | DrWatch Blog
- How to Remove Watch Bracelet Scratches Safely
- Rapidrepair
FAQ
Does WD-40 Really Remove Scratches From a Watch Bracelet?
No. WD-40 is a lubricant and light solvent, not an abrasive, so it won’t remove or blend a hairline scratch. It can strip lubricant from clasp mechanisms and attract dust over time, so it’s best avoided on any watch component.
How Do You Buff Out Scratches on Jewelry?
For polished metal, a Cape Cod polishing cloth worked in one direction typically blends hairline marks within a minute or two of controlled rubbing. For brushed finishes, an ultra-fine grey Scotch-Brite pad used parallel to the grain does the same job without creating a mismatched sheen.
Can You Buff Out Scratches on Metal?
Yes, shallow hairline scratches on metal can usually be buffed out because polishing simply removes a thin layer of surrounding metal to level the surface. Deeper scratches that catch a fingernail need machine polishing or professional refinishing instead, since hand buffing can’t remove enough material evenly.
Do Titanium Scratches Go Away?
Titanium scratches can be reduced but they need different handling than steel because titanium is softer and scratches more easily during polishing itself. A grey Scotch-Brite pad works for light marks, but deeper titanium scratches are usually better left to a watchmaker familiar with the metal.
Is It Better to Polish or Just Clean a Scratched Bracelet?
Clean first in almost every case, since most dull or “scratched” appearances come from grime rather than actual damage. Reach for polishing only after cleaning confirms a real mark is still there, and even then, keep it occasional rather than routine.