

How Watch Crystal Polishing Works: A Material Guide
Watch crystal polishing is defined as a controlled abrasion process that removes surface scratches by grinding down the crystal material with specialized compounds matched to the crystal’s hardness. The industry term for this process is surface lapping, though watch enthusiasts commonly call it crystal polishing or watch glass repair. How watch crystal polishing works depends entirely on what your crystal is made of. Acrylic, mineral glass, and sapphire each respond differently to abrasives, and using the wrong compound on the wrong material causes permanent damage. Tools like Polywatch, cerium oxide, and diamond paste each serve a specific crystal type. Getting this match right is the difference between a clear crystal and a ruined one.
How does crystal material affect polishing results?
The material of your crystal determines whether polishing will work, what compounds to use, and how much scratch removal you can realistically expect. DIY polishing effectiveness varies sharply by material: acrylic crystals allow 85–95% scratch removal, mineral glass achieves 60–70% improvement, and sapphire is generally non-polishable at home. That gap exists because each material sits at a different point on the Mohs hardness scale.
Acrylic crystals are the softest of the three. They scratch easily but respond beautifully to plastic polishes like Polywatch or Novus. Light to moderate scratches on acrylic disappear with a few minutes of buffing. The material is forgiving, and most enthusiasts can achieve near-perfect results at home.
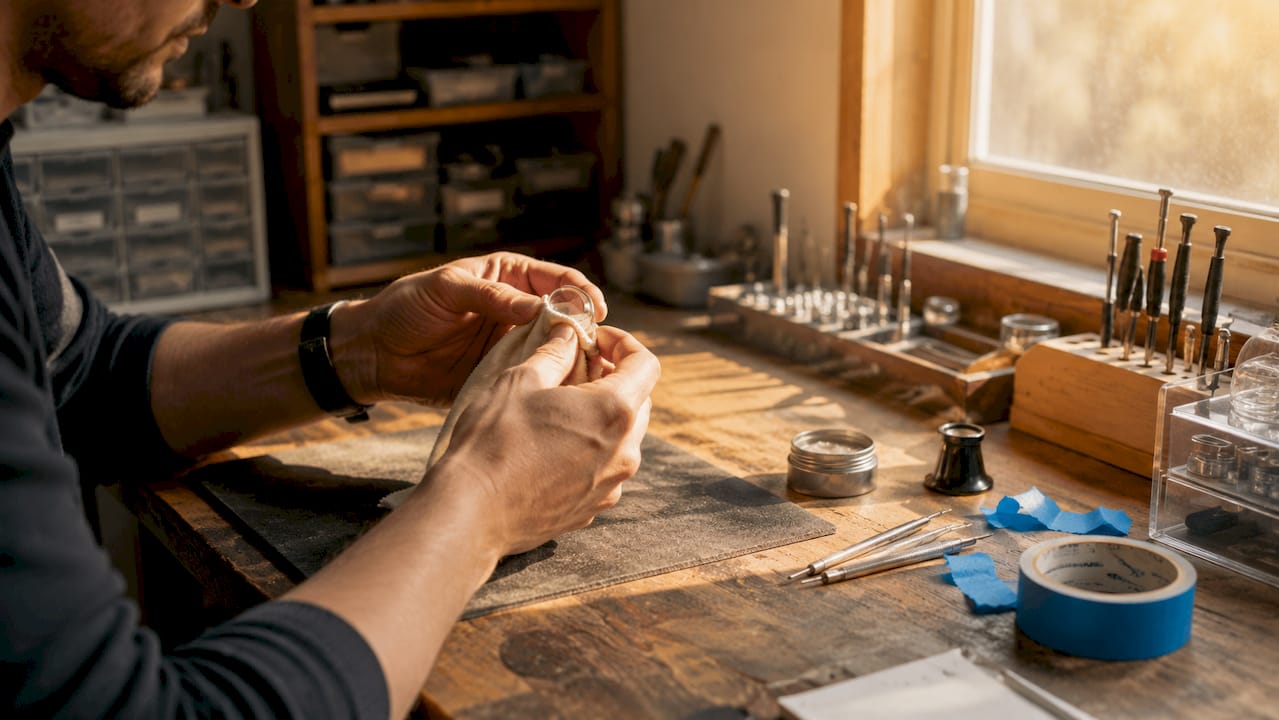
Mineral glass is harder and more scratch resistant than acrylic. Surface scratches improve with cerium oxide, but deep marks are often permanent. Polishing mineral glass takes more time and skill. Expect 3–5 cycles of 15–45 minutes each to see meaningful improvement.
Sapphire crystals sit at Mohs 9 hardness, just below diamond. Only diamond abrasives cut sapphire effectively. Home polishing of sapphire is risky and rarely produces professional results. A watchmaker with a lapping machine is the right call for any sapphire crystal with visible scratches.
| Crystal type | Hardness | Best compound | DIY success rate |
|---|---|---|---|
| Acrylic | Low (Mohs ~3) | Polywatch, Novus | 85–95% scratch removal |
| Mineral glass | Medium (Mohs ~5–6) | Cerium oxide | 60–70% improvement |
| Sapphire | Very high (Mohs 9) | Diamond paste | Not recommended at home |
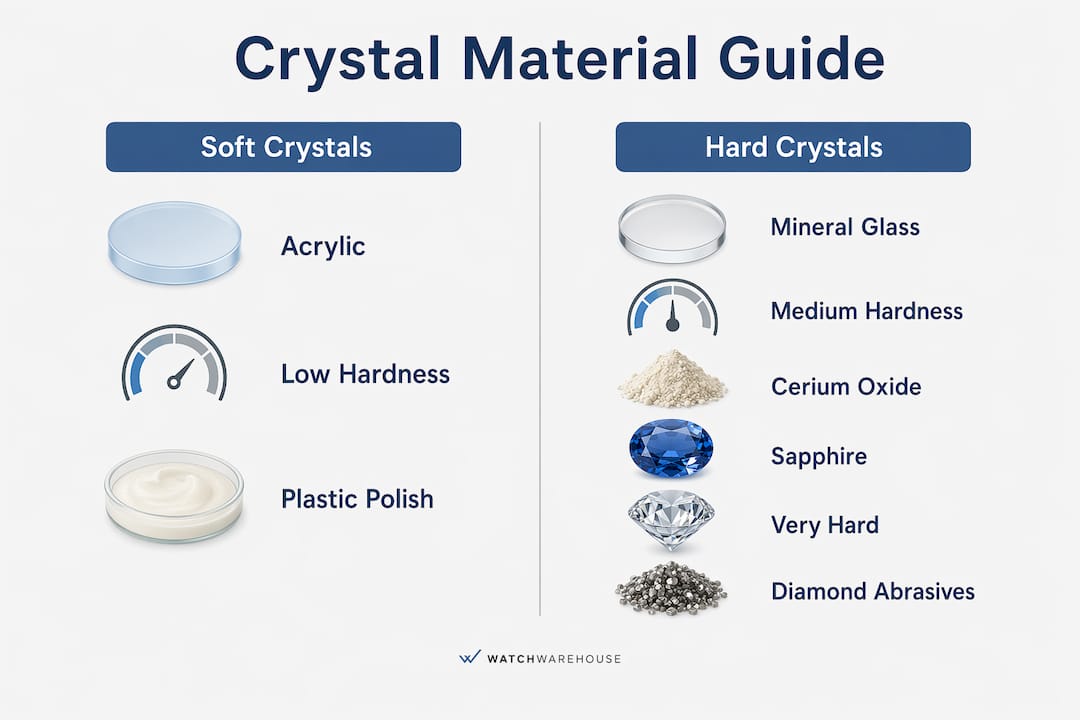
Correct crystal identification is the critical first step before touching any compound to your crystal. Misapplication causes worse scratches, haze, or an uneven finish that no amount of buffing will fix.
Pro Tip: Tap the crystal lightly with your fingernail. Acrylic produces a dull thud; mineral glass and sapphire produce a sharper click. When in doubt, check your watch’s specification sheet or contact the manufacturer.
What polishing compounds and tools do you need?
The right compound does the actual work. The tool just delivers it consistently.
For acrylic crystals:
- Polywatch is the standard choice. A single tube costs roughly the equivalent of a few dollars and can restore dozens of crystals.
- Novus Plastic Polish kits offer a three-step system (heavy cut, fine polish, and final shine) that produces excellent results on deeper acrylic scratches.
- A soft microfiber cloth or felt pad is all you need to apply either product.
For mineral glass:
- Cerium oxide powder mixed with water creates a slurry that slowly abrades glass surfaces. It requires patience and multiple passes.
- A low-speed rotary tool fitted with a felt pad distributes the compound evenly and reduces hand fatigue during longer sessions.
- Cerium oxide demands more skill than Polywatch. Uneven pressure leaves visible swirl marks.
For sapphire:
- Diamond polishing pastes in 3-micron and 1-micron grits are the only compounds that cut sapphire. You progress from coarser to finer grit, just as you would with sandpaper on wood.
- Even with the right paste, home results on sapphire are inconsistent. The risk of creating new scratches or damaging the AR coating is real.
Household abrasives like toothpaste get mentioned in online forums as a quick fix. Toothpaste has limited utility and works only on very light acrylic scratches. On mineral glass or sapphire, it does nothing useful and may leave fine abrasion marks. Stick to purpose-built compounds.
Pro Tip: Always apply compound to the cloth or pad, not directly to the crystal. Direct application concentrates abrasive in one spot and creates uneven polishing.
For a broader look at polishing cream options, ChronoCare’s guide breaks down product types and their specific applications by surface.
Watch polishing step by step: the DIY process
A clean, masked watch is the starting point for every successful polishing session. Skipping preparation is the most common mistake enthusiasts make.
Step 1: Clean the crystal. Remove all dirt, oils, and debris before applying any compound. A clean surface lets you see existing scratches clearly and prevents grit from grinding into the crystal during polishing.
Step 2: Mask the bezel. Low-tack painter’s tape is the recommended material for protecting the metal case and bezel. Apply it carefully around the crystal edge, pressing it flat so no compound seeps underneath. This step protects your watch’s finish from accidental abrasion.
Step 3: Apply compound and buff. Use small, firm, circular motions. Work across the entire crystal surface rather than focusing on one scratch. Concentrated pressure in one area creates low spots that distort light and look worse than the original scratch.
Step 4: Follow grit progression for acrylic. The grit progression technique moves from a heavy-cut compound to a fine polish to a final shine. Skipping steps leaves a foggy, diffused surface that cannot be corrected without starting over. This three-step sequence is industry standard for acrylic restoration.
Step 5: Inspect and repeat. After each cycle, wipe the crystal clean and inspect under a bright light. Scratches will appear less defined with each pass. Mineral glass typically needs 3–5 full cycles before improvement is visible.
Step 6: Know when to stop. A temporary haze appears during sanding on mineral glass. Completing the final buffing stage removes this haze entirely. Stopping mid-process leaves the haze permanently. If scratches remain deep after five full cycles, the crystal needs professional attention or replacement.
One critical warning: some crystals carry anti-reflective coatings on their inner or outer surface. These coatings look like a faint blue or green tint. Polishing removes them permanently. If your crystal has an AR coating, polishing is not the right solution.
When does a watch crystal need professional repair or replacement?
DIY polishing has a clear ceiling. Knowing where that ceiling sits saves you from turning a fixable scratch into a destroyed crystal.
The criteria for professional intervention are straightforward:
- The scratch catches your fingernail. If you can feel the scratch with your nail, it is too deep for surface polishing to fix. The groove extends below the surface layer that abrasives can reach.
- The crystal is chipped or cracked. No amount of polishing repairs structural damage. A cracked crystal compromises water resistance immediately.
- The crystal is sapphire. Home polishing of sapphire produces inconsistent results and risks permanent damage. A professional watchmaker with a lapping machine is the correct choice.
- The watch is a high-value piece. Professional crystal replacement costs $150–$500 or more depending on the watch brand and crystal type. That cost is worth it when the alternative is damaging a watch worth many times more.
Professional restoration goes beyond aesthetics. Calibrated pressure testing verifies water resistance after any crystal work, using specialized equipment that amateurs cannot replicate at home. Polishing or replacing a crystal disturbs the gasket seal. Without a pressure test, you have no way to know if your watch is still water resistant. Experts also caution that polishing cannot fix scratches that compromise seals, leaving the watch vulnerable to moisture damage regardless of how good the surface looks.
Common pitfalls and maintenance tips for watch crystal care
Most polishing failures trace back to one of five avoidable mistakes.
- Skipping material identification. Using diamond paste on acrylic destroys the surface. Using acrylic polish on mineral glass wastes your time. Identify the crystal material before opening any compound.
- Applying too much pressure. Firm, consistent pressure works. Grinding down hard creates uneven surfaces and heat that can warp acrylic crystals.
- Skipping grit steps. Each step in a progression removes the marks left by the previous step. Jump ahead and those marks become permanent.
- Ignoring AR coatings. An anti-reflective coating that looks scratched may simply be worn. Polishing removes it entirely. Inspect carefully before proceeding.
- Neglecting the bezel. Compound on metal surfaces leaves fine scratches on brushed or polished finishes. Masking is not optional.
Regular maintenance reduces how often you need to polish at all. Storing your watch in a case, avoiding contact with hard surfaces, and cleaning the crystal regularly with a soft cloth prevents the buildup of light scratches that accumulate over time. For guidance on protecting your watch’s finish during maintenance, ChronoCare covers the specific techniques that preserve value.
Pro Tip: After polishing, apply a thin layer of watch crystal protectant to slow future scratch accumulation. This works best on acrylic and mineral glass crystals.
Key Takeaways
Watch crystal polishing works by matching the abrasive compound to the crystal material, following a grit progression, and completing every buffing stage without stopping early.
| Point | Details |
|---|---|
| Material determines method | Acrylic uses Polywatch, mineral glass uses cerium oxide, sapphire requires diamond paste. |
| Grit progression is non-negotiable | Skipping steps in the compound sequence leaves permanent haze on acrylic and mineral glass. |
| Masking protects the case | Low-tack painter’s tape prevents compound from scratching the metal bezel during polishing. |
| Deep scratches need professionals | Scratches that catch a fingernail, chips, and cracks require professional replacement, not DIY polishing. |
| Pressure testing matters | Professional crystal work includes calibrated water resistance testing that DIY polishing cannot replicate. |
What I’ve learned from polishing watch crystals at home
The satisfaction of restoring a scratched acrylic crystal yourself is real. I’ve done it dozens of times, and a good Polywatch session on a vintage piece with a fogged crystal is genuinely rewarding. The result, when you follow the process correctly, looks factory fresh.
But I’ve also seen enthusiasts ruin crystals by rushing. The most common mistake is stopping mid-polish when the haze appears during sanding. That haze is normal. Abandoning the process at that point leaves a permanently cloudy crystal. Patience through the full cycle is what separates a good result from a disaster.
My honest position on sapphire: don’t attempt it at home. The risk-to-reward ratio is poor. Diamond paste is unforgiving, the pressure required is difficult to control by hand, and one wrong move on a sapphire crystal from a Rolex or Omega costs you far more in professional repair than if you had gone to a watchmaker from the start. Save the DIY work for acrylic and light mineral glass scratches.
Preparation matters more than technique. Mask carefully, clean thoroughly, and identify your crystal material before you open any compound. Those three steps done right make everything else easier. And if you are ever unsure whether a scratch is too deep to polish, run your fingernail across it. That simple test tells you more than any visual inspection.
— Raymond Jenkins
ChronoCare’s polishing kits for watch enthusiasts
Knowing the process is step one. Having the right products makes the difference between a frustrating session and a clean result.
ChronoCare’s Ultimate Watch Polishing & Cleaning Kit brings together the compounds, cloths, and tools needed for acrylic and mineral glass crystal care in one package. For enthusiasts focused on light scratch removal and surface restoration, the Watch Polishing Cream delivers consistent results on watch surfaces without the guesswork of mixing compounds. Both products are formulated in the US and designed specifically for the demands of luxury watch maintenance. ChronoCare also offers a full watch cleaning kit for collectors who want a complete care routine.
FAQ
What is the difference between acrylic and sapphire crystal polishing?
Acrylic crystals are soft and respond to plastic polishes like Polywatch, achieving 85–95% scratch removal at home. Sapphire crystals require diamond abrasives and professional equipment, making home polishing risky and generally ineffective.
Can toothpaste remove scratches from a watch crystal?
Toothpaste works only on very light scratches on acrylic crystals. It has no meaningful effect on mineral glass or sapphire and can leave fine abrasion marks on any surface.
How long does DIY watch crystal polishing take?
Acrylic polishing takes roughly 10–20 minutes per session. Mineral glass requires 3–5 cycles of 15–45 minutes each before visible improvement appears.
When should I replace a watch crystal instead of polishing it?
Replace the crystal when scratches catch your fingernail, when the crystal is chipped or cracked, or when the watch is a high-value piece with a sapphire crystal. Professional replacement costs $150–$500 or more depending on the brand.
Does polishing a watch crystal affect water resistance?
Yes. Polishing or replacing a crystal can disturb the gasket seal. Professional watchmakers perform calibrated pressure testing after any crystal work to verify that water resistance is intact.