
How to Stage Luxury Watch Photography Like a Pro
Luxury watches are among the hardest objects to photograph well. Their polished cases, sapphire crystals, and intricate dials reflect everything around them, including you, your lights, and every flaw in your setup. When you stage luxury watch photography properly, though, those reflections become assets. They reveal depth, craftsmanship, and the kind of visual complexity that makes high-end timepiece images stop people mid-scroll. This guide covers the full process: gear selection, light control, creative staging, shooting workflow, and post-production. Whether you’re a collector wanting to document your pieces or a photographer breaking into the watch niche, you’ll leave with a working system.
Table of Contents
- Key takeaways
- How to stage luxury watch photography: equipment and preparation
- Controlling light and managing reflections
- Creative staging and background selection
- The shooting workflow and post-production process
- My honest take on what actually makes the difference
- Get your watch photo-ready before the first shot
- FAQ
Key takeaways
| Point | Details |
|---|---|
| Preparation is non-negotiable | Clean and position the watch before touching a camera setting or light modifier. |
| Light subtraction beats addition | Black cards control reflections more effectively than adding more light sources. |
| Focus stack for sharpness | A single macro exposure cannot keep the full dial sharp. Stack multiple frames. |
| Background supports the watch | Neutral, textured backdrops complement the timepiece without competing with it. |
| Clean watch, cleaner image | Dust and fingerprints become glaring flaws under macro lenses. Remove them first. |
How to stage luxury watch photography: equipment and preparation
Getting this right starts long before you trigger the shutter. The gear you choose and how you prepare the watch will determine 60 percent of your final result.
For cameras, a mirrorless or DSLR body with a macro lens in the 90mm to 105mm range gives you the working distance and magnification you need without the lens hovering inches from the dial. Lenses like the Nikon 105mm f/2.8 or Canon 100mm f/2.8L are trusted tools in this genre. If you’re working on a budget, a 50mm lens with extension tubes can produce surprisingly capable results.
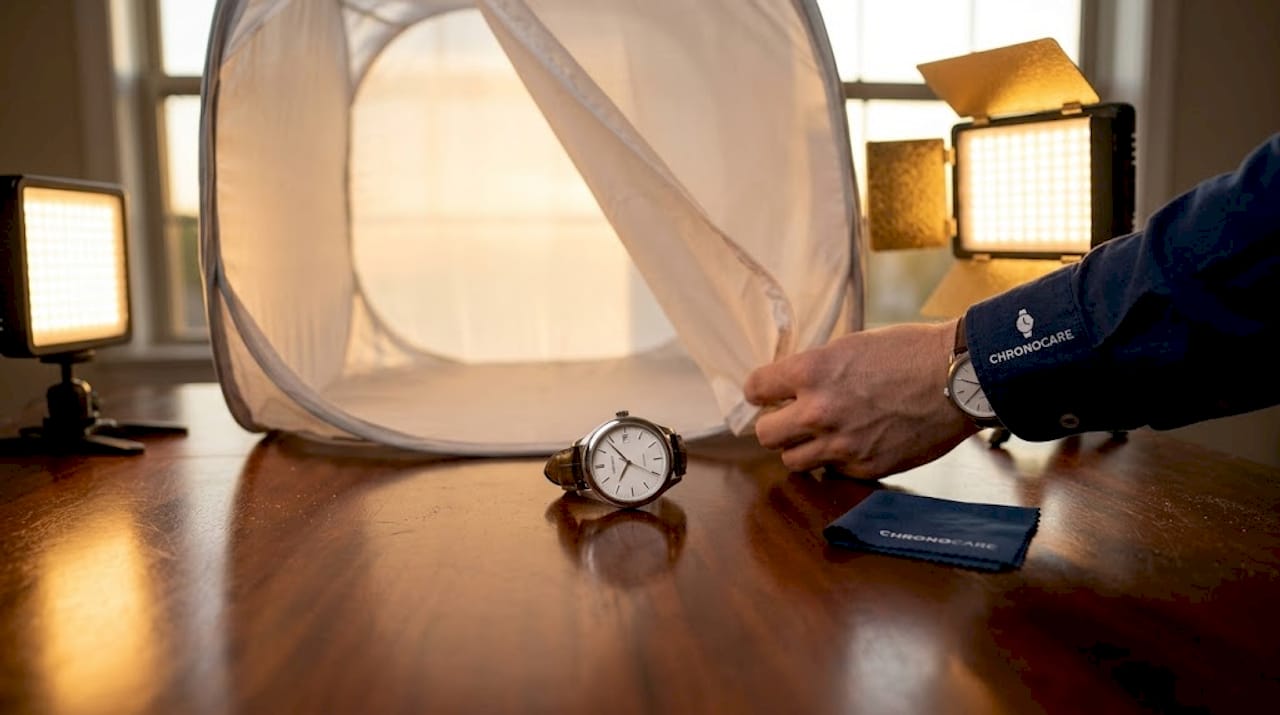
Lighting hardware
Your two most useful light modifiers for a luxury watch photoshoot are a diffused shooting tent (or cone) and at least two softboxes or LED panels. A single bare strobe on a reflective watch surface is a disaster waiting to happen. You need soft, wrapping light that grazes surfaces without creating hot spots. A shooting table with translucent acrylic or plexiglass allows you to light from below, which opens up shadow detail in the case and bracelet.
Pre-shoot preparation
This step is where most hobbyist setups fail. Before any camera touches the scene, the watch needs to be immaculate. Remove fingerprints thoroughly using a lint-free cloth and appropriate cleaning solution. Under a macro lens at f/8, every smudge becomes a landscape.
Watch hands set to 10:10 is the professional standard for a reason. That position creates a balanced, symmetrical frame that centers the logo, leaves complications readable, and draws the eye naturally across the dial. Use a case cushion or watch stand to hold the piece at a consistent angle without touching the crystal.
| Tool | Purpose |
|---|---|
| 90-105mm macro lens | Achieves necessary magnification with working distance |
| Diffused shooting tent | Eliminates harsh reflections on crystal and case |
| Black foam boards | Subtractive lighting for metal texture and contrast |
| Lint-free microfiber cloth | Removes dust, oils, and fingerprints before shooting |
| Watch stand or case cushion | Holds piece at repeatable angles without contact marks |
| Circular polarizing filter | Cuts glare through sapphire crystals to reveal dial detail |
Pro Tip: Shoot in a sealed, dust-free environment if possible. Even ambient dust particles settle on a watch during a session, and each one costs retouching time later.
Controlling light and managing reflections
This is where the real technical skill in watch photography lives. A polished stainless steel case or a high-gloss dial reflects its entire environment. Your job is to control exactly what it reflects.
Diffused cones and shooting tables are the foundation of professional setups because they wrap the watch in a uniform, soft light source. The light appears to come from everywhere at once, which eliminates the single-point glare that plagues direct flash setups.
Subtractive lighting explained
Most photographers think about adding light. Professional watch photographers think about removing reflections. Subtractive lighting with black foam boards means placing black cards strategically around the watch to reflect darkness back into the polished surfaces. This creates gradients and tonal transitions on metal that read as depth and richness rather than the flat, gray uniformity you get from straight diffused light.
Here is a practical sequence for building your reflection control:
- Start with a single diffused overhead light and photograph the watch.
- Identify the flat or blown-out metal areas in the resulting image.
- Place black foam boards on the sides that are reflecting white or ambient light.
- Photograph again and compare. The metal will show dramatic improvement in perceived depth.
- Refine board positions in small increments until gradients appear natural.
- Add a second light source from below or at 45 degrees for fill, then repeat the black card process.
A circular polarizing filter (CPL) is your second most powerful tool for crystal management. CPL filters cut through glass glare, revealing the dial underneath instead of a white wash of reflected light. Rotate the filter while looking through the viewfinder until reflections on the crystal disappear.
Focus stacking is non-negotiable for macro watch photography. The shallow depth of field at close working distances means a single frame cannot keep the bezel, dial, and crystal sharp simultaneously. Capture a series of images shifting focus incrementally from the nearest element to the farthest, then blend them in software like Helicon Focus or Photoshop’s Auto-Blend Layers.
The most common mistake in amateur watch photography is using a single bare light at close range. It creates one dominant reflection that turns a Patek Philippe into something that looks like a drugstore watch. Remove light before you add it.
Pro Tip: Shoot two separate exposures at identical settings: one correctly exposed for the dial and one exposed for the case. Blend them in post-production to retain detail in both high and shadow areas without compromising accuracy.
Creative staging and background selection
The background and props you choose say something about the watch before the viewer even focuses on the dial. Staging a Rolex Submariner on weathered slate reads completely differently than the same watch on white marble. Both can be right. The choice depends on the story you’re telling.
For dress watches like a Jaeger-LeCoultre Reverso or a Patek Philippe Calatrava, lean toward surfaces that communicate refinement. Brushed velvet, aged leather, matte linen, or polished stone in neutral tones work well. The texture of the background adds visual interest without color competition. Keep strap material choices consistent with the backdrop so the whole image feels cohesive.
Sports watches and tool watches tolerate more aggressive staging. A diving watch photographed on wet stone, dark granite, or alongside a worn leather notebook reads as authentic rather than affected. The rougher the background texture, the more the watch’s precision and finish stand out by contrast.
A few guidelines worth knowing:
- Avoid backgrounds that share the watch’s dominant color. A black dial watch on a black surface reads as muddy.
- Limit props to one or two objects maximum. A second item in frame should reinforce the watch’s character, not distract from it.
- Staging luxury jewelry shares several principles with watch photography: negative space, neutral textures, and single-point focus keep the subject commanding.
- Matte and semi-matte backgrounds prevent competing reflections from complicating your lighting setup.
- Consider depth. A flat background is safe. A surface with slight relief, like rough concrete or woven fabric, creates foreground separation when shot with shallow depth of field at the background plane.
Pro Tip: Test your background with a gray card before bringing the watch into frame. Evaluate whether the background reflects or absorbs your light setup. A background that bounces light upward can create unintended fill, which may or may not work in your favor.
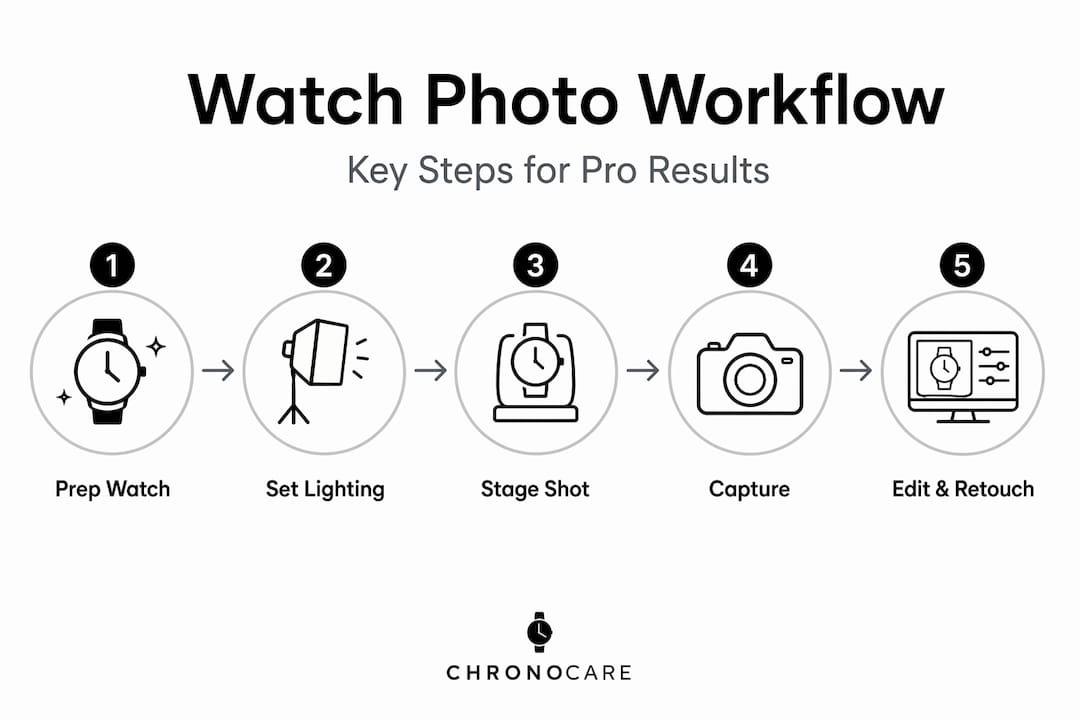
The shooting workflow and post-production process
With lighting set, reflections managed, and the scene staged, the actual capture phase follows a repeatable sequence. Consistency matters here. E-commerce and batch photography require consistent angles and lighting setups so different models can be compared fairly. Even for personal documentation, repeatable setups save hours of rework.
- Set your camera to manual mode. Start at ISO 100, f/11, and adjust shutter speed for correct exposure. Aperture around f/8 to f/11 balances diffraction softness with depth of field at macro distances.
- Use a remote shutter release or 2-second self-timer to eliminate camera shake.
- Shoot a hero shot from directly above or at a slight 10-degree angle first. This is your primary composition.
- Capture a caseback or movement shot if the watch has an exhibition back.
- Shoot a wrist shot if lifestyle context is part of the story.
- For lume shots: charge the lume with UV light, move to a fully darkened space, and shoot at 2 to 5 seconds exposure. Composite this frame over your standard hero shot in post.
| Shot type | Settings emphasis | Purpose |
|---|---|---|
| Hero dial | f/11, focus stack, ISO 100 | Primary product image |
| Detail close-up | f/8, tight crop on complication | Showcase finishing and texture |
| Caseback/movement | f/8 to f/11, polarizer | Highlight mechanical detail |
| Lume shot | Long exposure, dark room | Show luminous markers in context |
| Lifestyle/wrist | f/2.8 to f/4, shallow DOF | Contextual storytelling |
For post-production, retouching must preserve horological texture while removing distractions. Remove dust spots with the healing brush at low opacity. Remove fingerprints with frequency separation so the metal texture underneath stays intact. Never flatten or smooth the brushed or satin finishing on a case. Those micro-scratches of light are what makes the watch look real.
Pro Tip: Do your retouching at 100 percent zoom on a calibrated monitor. Corrections made at 50 percent zoom miss defects that will be obvious in final delivery.
My honest take on what actually makes the difference
I’ve watched photographers invest in expensive lighting setups and still produce flat, uninspiring watch images. And I’ve seen people work with a $5 watch, a piece of white foam, and bounced silver card light create something genuinely impressive. The honest difference is not gear. It’s patience and observation.
What I’ve found separates good watch photos from great ones is whether the photographer actually looked at the watch before shooting it. Understands how the light is catching the applied indices. Notices the way the case bevels transition between matte and polished. That level of attention informs every micro-decision in the setup.
The other thing I’d push back on is the idea that perfect retouching equals professional quality. I’ve seen retouching specialists who know when to stop. They understand that a fully smoothed, reflections-corrected dial sometimes looks more like a render than a photograph. Some grain, some imperfection in the light, some genuine texture in the metal surface is what gives a watch photo its weight and credibility.
My personal rule: spend twice as long on preparation as on shooting. Clean the watch. Set the scene. Adjust the black cards. Evaluate each reflection deliberately. The camera work itself is the easy part once everything else is right.
— Eduardo
Get your watch photo-ready before the first shot
Before your lighting is even set up, the watch itself needs to be flawless. Under a macro lens, a single fingerprint or microfiber scratch reads like a road surface. That means the quality of your cleaning routine directly determines the quality of your images.
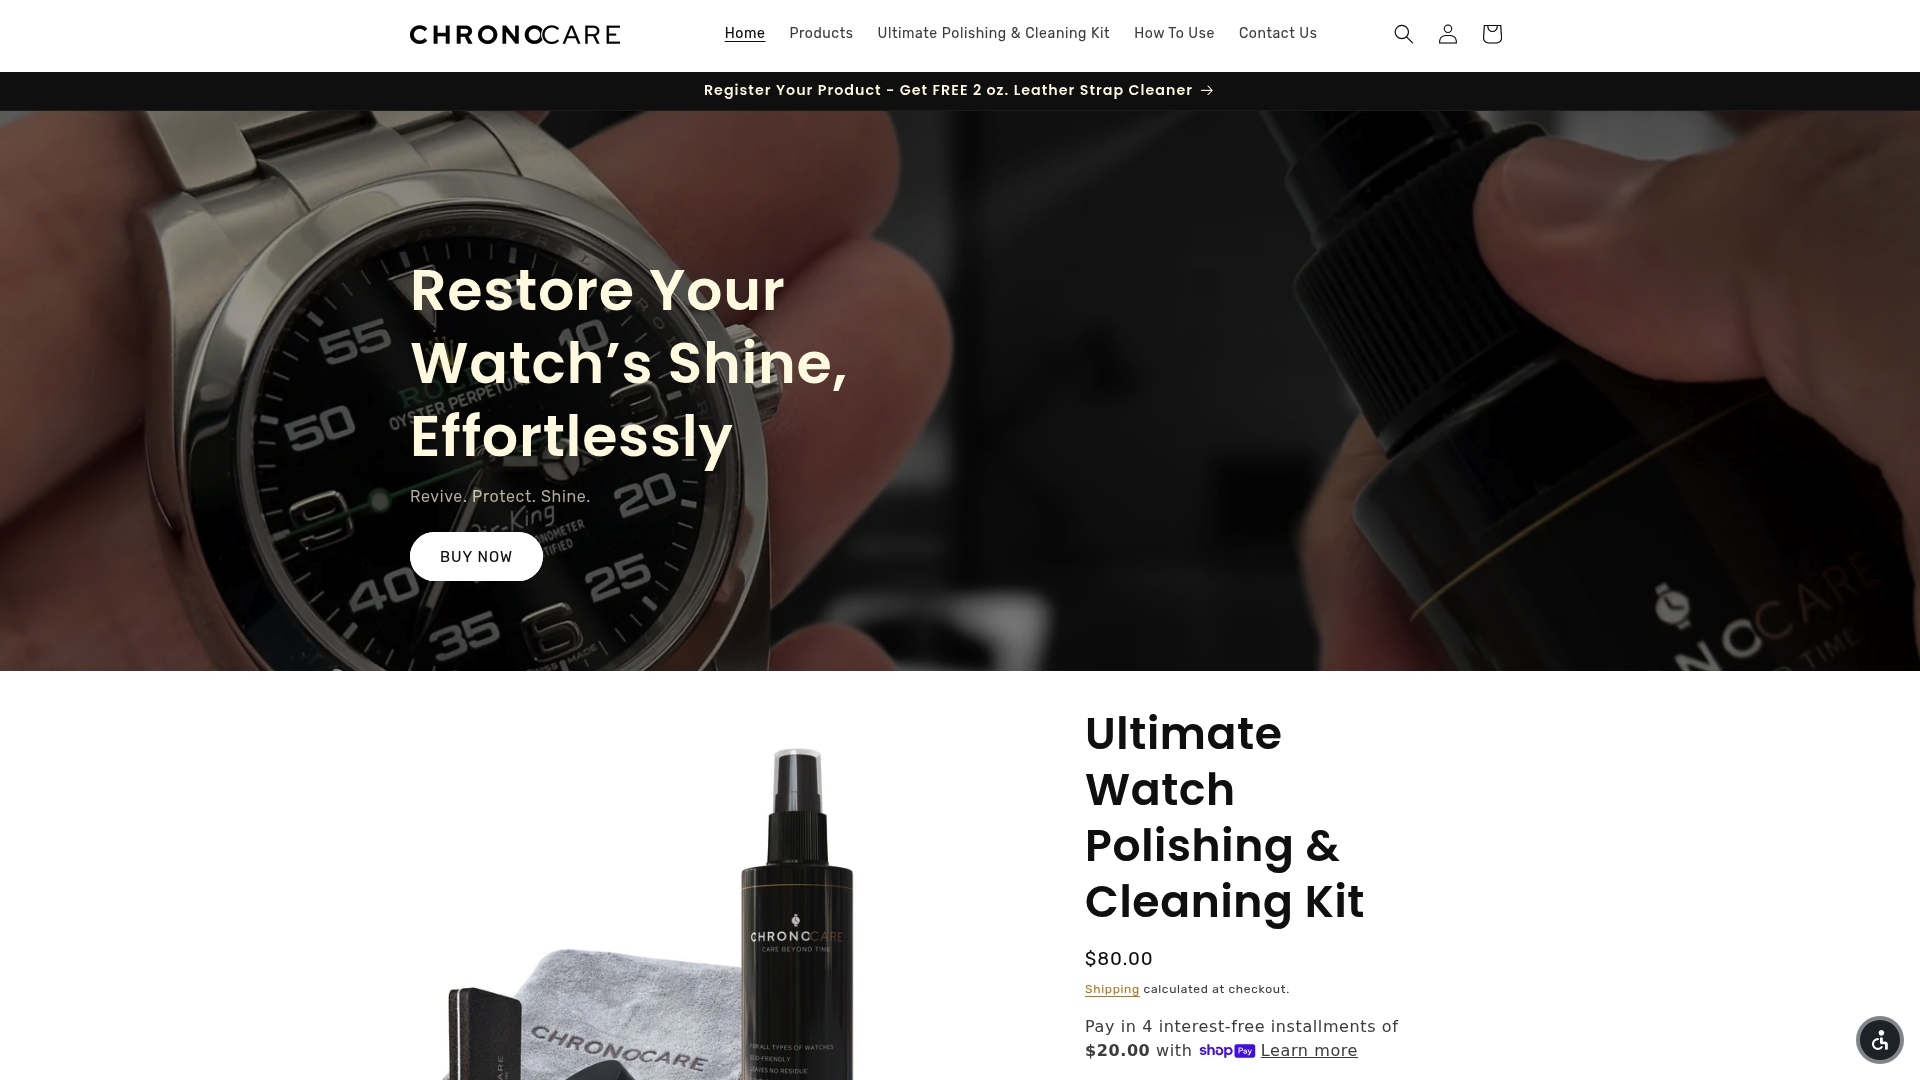
Shopchronocare carries professional cleaning and restoration kits formulated specifically for luxury timepieces. From crystal-safe cleaning sprays to polishing creams designed to restore case brilliance without damaging finishing, every product in the lineup is designed with the collector’s standards in mind. If you’re serious about producing high-end timepiece images that reflect the true value of what you own, start with a watch polishing and cleaning kit that does the job properly. Premium watch care is not a luxury step. It’s the first step.
FAQ
What is the best hand position for watch photography?
The standard is 10:10 position, which creates visual symmetry, centers the brand logo, and keeps complications clearly visible. Nearly all professional product photos use this as the default starting point.
How do I remove reflections from a watch crystal?
Use a circular polarizing filter and rotate it until glare on the sapphire crystal disappears. Combine this with a diffused light source, such as a shooting tent, for best results.
Do I need expensive equipment to photograph luxury watches well?
Not necessarily. Inexpensive bounced lighting with silver cards and foam board diffusers can produce images comparable to studio setups. Technique and light control matter far more than the cost of your gear.
What is focus stacking and why does it matter for watch photography?
Focus stacking combines multiple exposures taken at different focal planes into one sharp image. At macro distances, no single shot can keep the entire dial and bezel in focus, so stacking is the standard solution.
How should I retouch watch photos without losing authenticity?
Remove dust and fingerprints carefully using frequency separation, but leave brushed finishing and case texture intact. Flattening or over-smoothing surfaces makes the image look like CGI rather than a real photograph.